
Want to create a unique avatar that reflects your personality? Midjourney is exactly the tool that can bring your ideas to life. In this article, we'll break down how to create stunning avatars with neural networks, even if you've never worked with tools like this before.
What is Midjourney?
Midjourney is a neural network that turns text descriptions into visual images. Unlike graphic editors, you don't need any drawing or design skills here. Just describe the result you want in words, and the neural network will create an image matching your description.
What makes this neural network special is that it excels at generating portraits and avatars in a wide range of artistic styles: from realistic photos to cartoon characters and fantasy imagery.
Thanks to recent updates, it's now possible to create images that preserve a specific person's recognizable features while stylizing them in the chosen artistic manner.
Key benefits of Midjourney for creating avatars:
- A wide range of styles – from photorealistic portraits to anime characters;
- High level of detail in images with a well-crafted prompt;
- Ability to preserve recognizable facial features;
- Flexible parameter tuning for precisely conveying the image you have in mind;
- Fast generation of several options to choose from.
It's important to understand a key feature of this neural network. It's not just a filter applied to a photo. It's a full-fledged tool for creating new images that takes into account your wishes for style, mood, and details of the image.
Step-by-step guide: creating an avatar in Midjourney
Step 1: Preparing the source material
The quality of the source photo plays a key role in the final result. The neural network analyzes every detail of the image, so even small flaws or poor lighting can affect the quality of the avatar. Try to use photos taken in natural light or under studio conditions.
- Good lighting and sharpness;
- A frontal angle or a slight head turn;
- A neutral or solid-colored background;
- Clearly visible facial features;
- A minimum of extraneous objects in the frame.
Step 2: Uploading your photo
When uploading a photo, pay attention to the platform's technical requirements. The neural network works best with JPG or PNG files no larger than 5 MB, so make sure your photo meets these parameters beforehand. This will help you avoid errors and make the avatar creation process smoother.
To get started, find Midjourney in GPTunneL's library of neural networks, where the service works without a VPN or subscriptions. Uploading a photo is very easy:
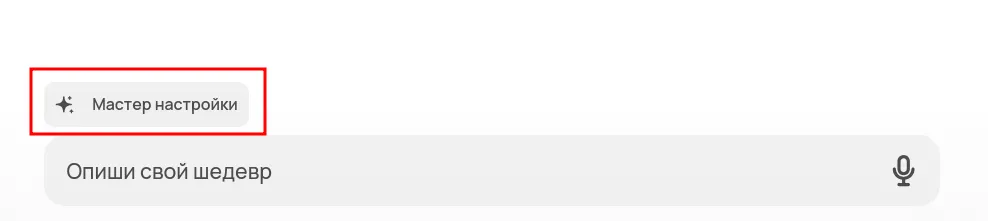
- Open the settings wizard by clicking the corresponding button in the chat.
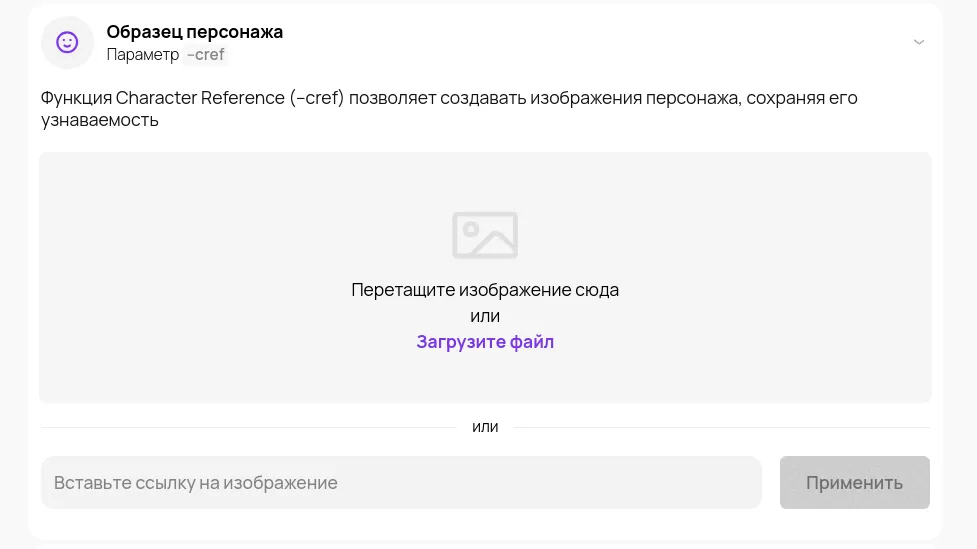
- In the settings wizard, choose the -cref parameter (character reference). Add an image of yourself or your favorite characters to use as a character reference for the generation. You can do this by uploading a file or simply sending a link.
Step 3: Writing the prompt
A prompt is a text description of what you want to get. Every word matters. Precision in the description helps you get exactly the result you're expecting. Besides text alone, the best tool for customizing your prompts is GPTunneL's settings wizard.
With this editor you can adjust every generation parameter:
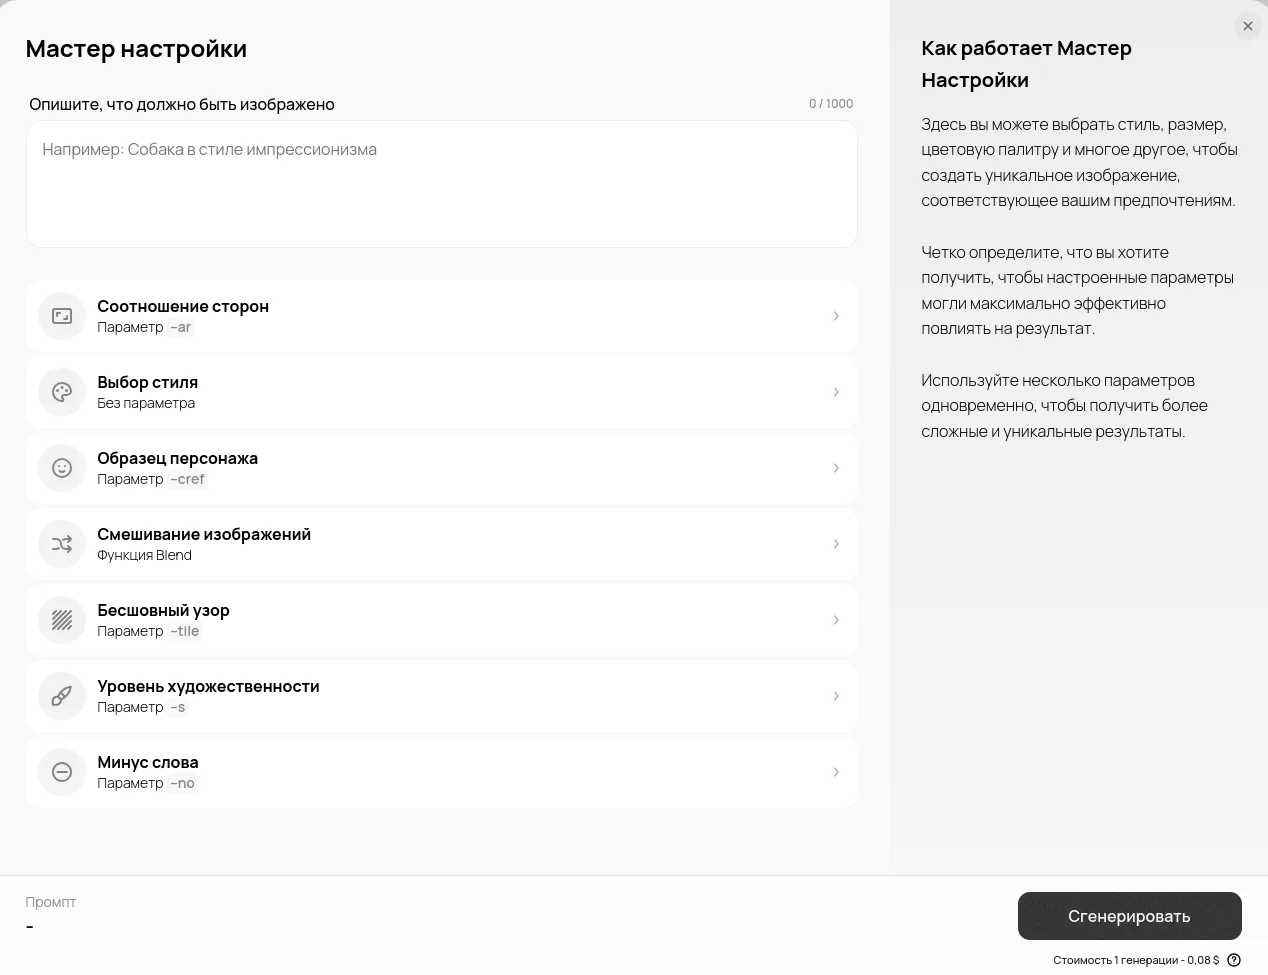
For example, you can edit the aspect ratio, style, the tiling parameter (not needed for an avatar, but useful for creating repeating tile patterns in an image), and the stylization level. You can also specify elements you don't want to see (negative prompts).
Step 4: Choosing a style
This step defines the character of your future avatar, so approach it creatively. Experiment with different styles until you find the one that best conveys your personality. Here are a few popular options:
- Disney Pixar style (cartoon style);
- Anime (anime style);
- Watercolor (watercolor technique);
- Oil painting;
- Cyberpunk.
Step 4: Put it all together and get the finished image
Here's the structure of an effective prompt for creating an avatar, built with the settings wizard:
--cref [link to your image] [detailed description of appearance], [desired style], [additional elements], keep the consistency of action, expression, clothing, shape and appearance of the photos --ar [ratio] --s [stylization level] --no [unwanted elements]
By the way, you can generate the prompt text with our assistant based on Claude 3.5 Sonnet, trained to create prompts for Midjourney. For example, we used it for the prompt below.
Let's try creating an avatar based on a photo of Scarlett Johansson from Wikipedia:
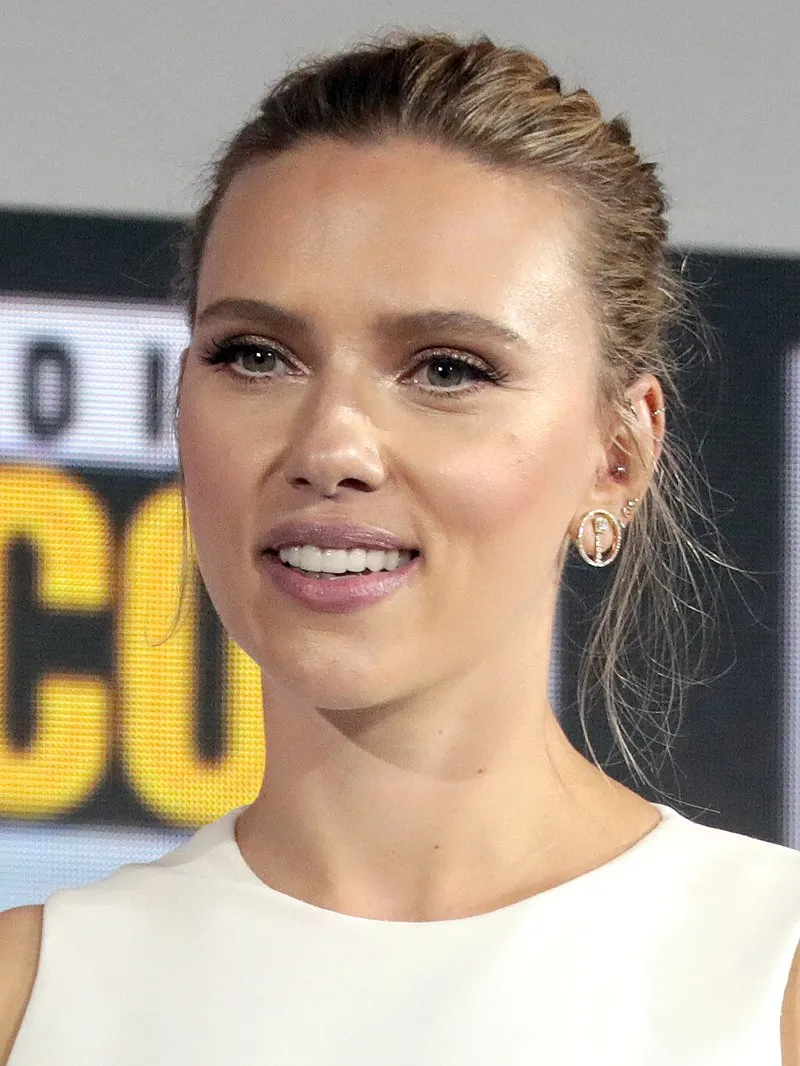
Prompt:
/x/tU8wZf.jpg Photorealistic style, attractive woman in her 30s with blonde hair in elegant updo, defined cheekbones, bright smile, wearing white sleeveless dress, natural makeup with subtle bronze eyeshadow and lips, standing in modern urban setting with glass skyscrapers, soft evening city lights in background, close-up portrait, professional studio lighting with soft highlights, cinematic atmosphere --ar 2:3 --s 650
Here are the 4 stylish avatars we got after generation:
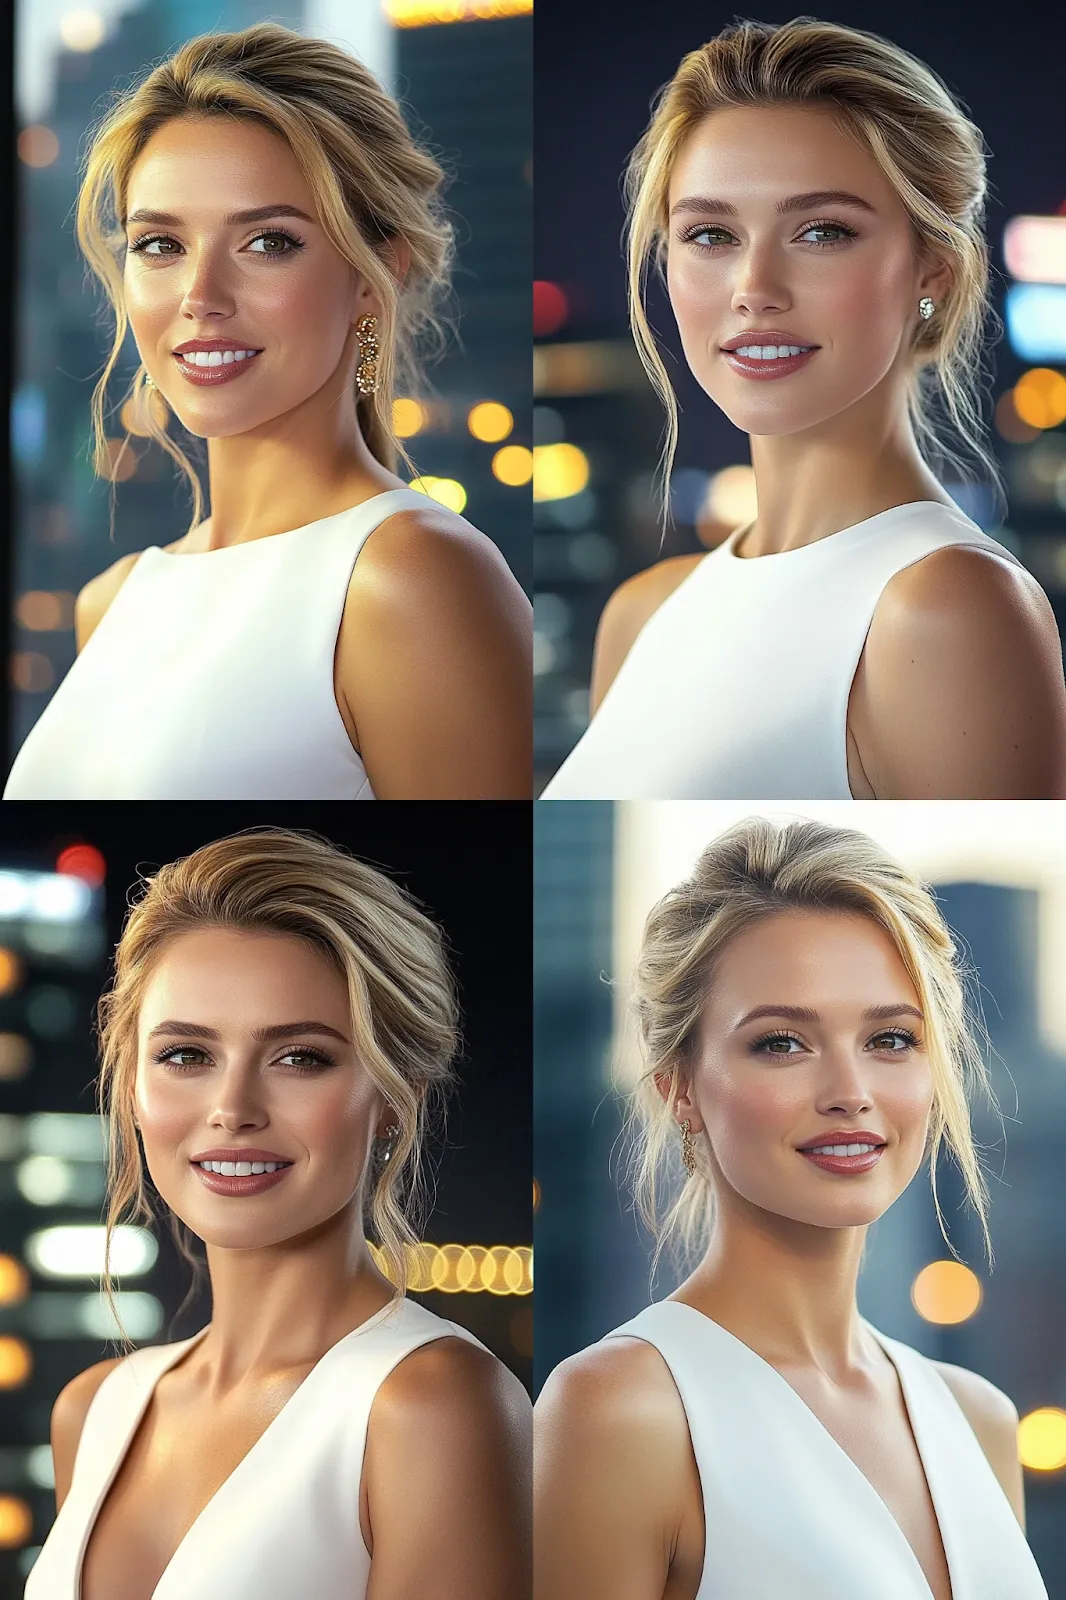
Note that all prompts written in a language other than English get automatically translated into English. This is necessary for Midjourney to work correctly, since it was trained on English-language datasets and understands prompts in that language best.
Step 5. Refine the image with FaceSwap, if needed
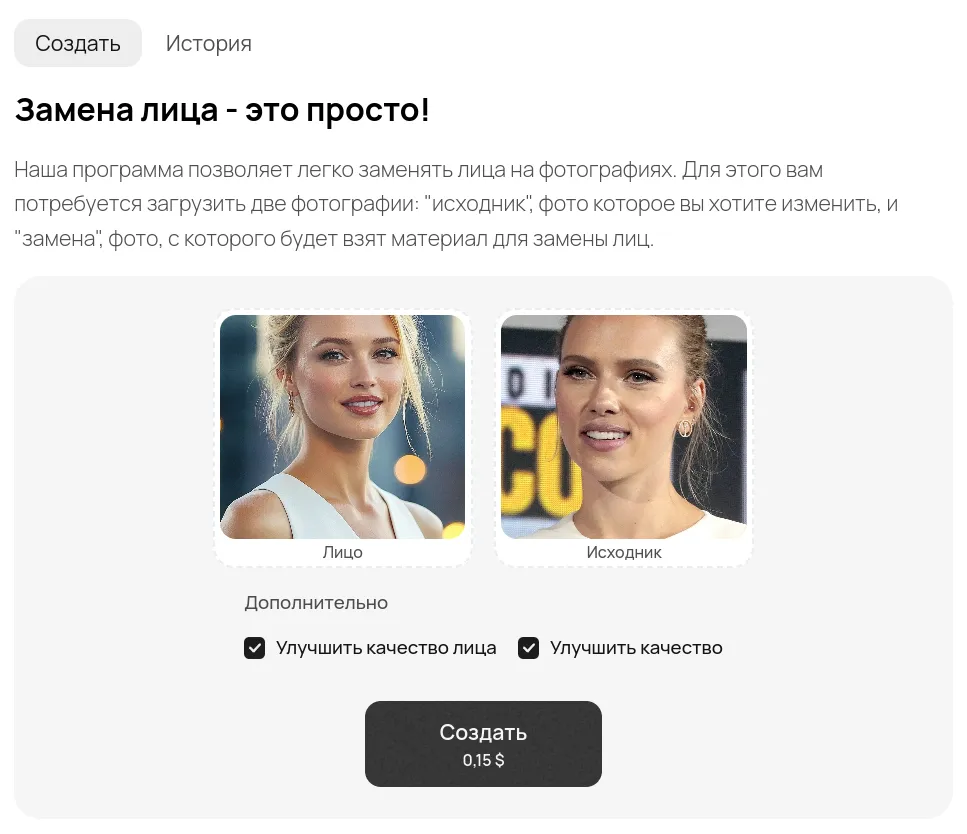
FaceSwap 2 is a GPTunneL tool that lets you combine the source photo with the image generated from it. With this tool you can easily generate an even more accurate avatar. To do this, you need to provide the source and the generated avatar.
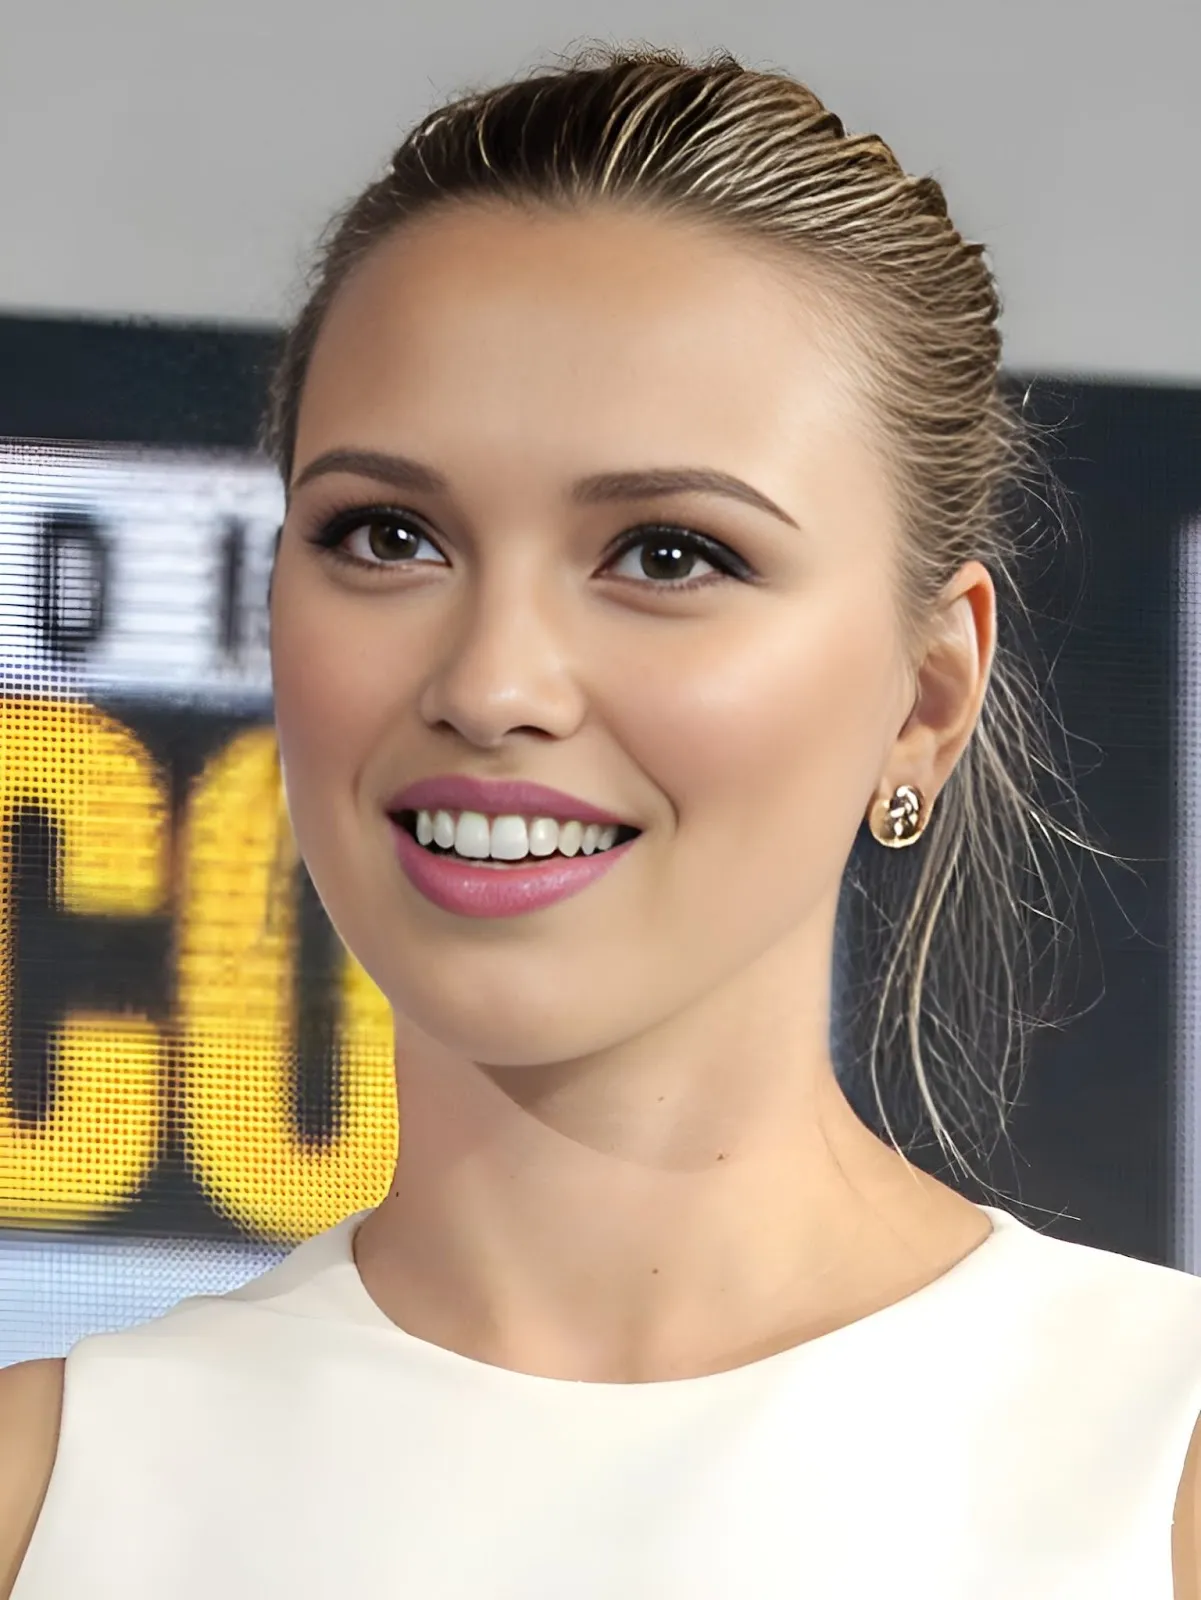
Let's try using the Midjourney generation as the "face" and providing the Wikipedia picture as the source. We'll also ask the tool to improve the quality of the face and the whole photo.
Here's what we got in the end:
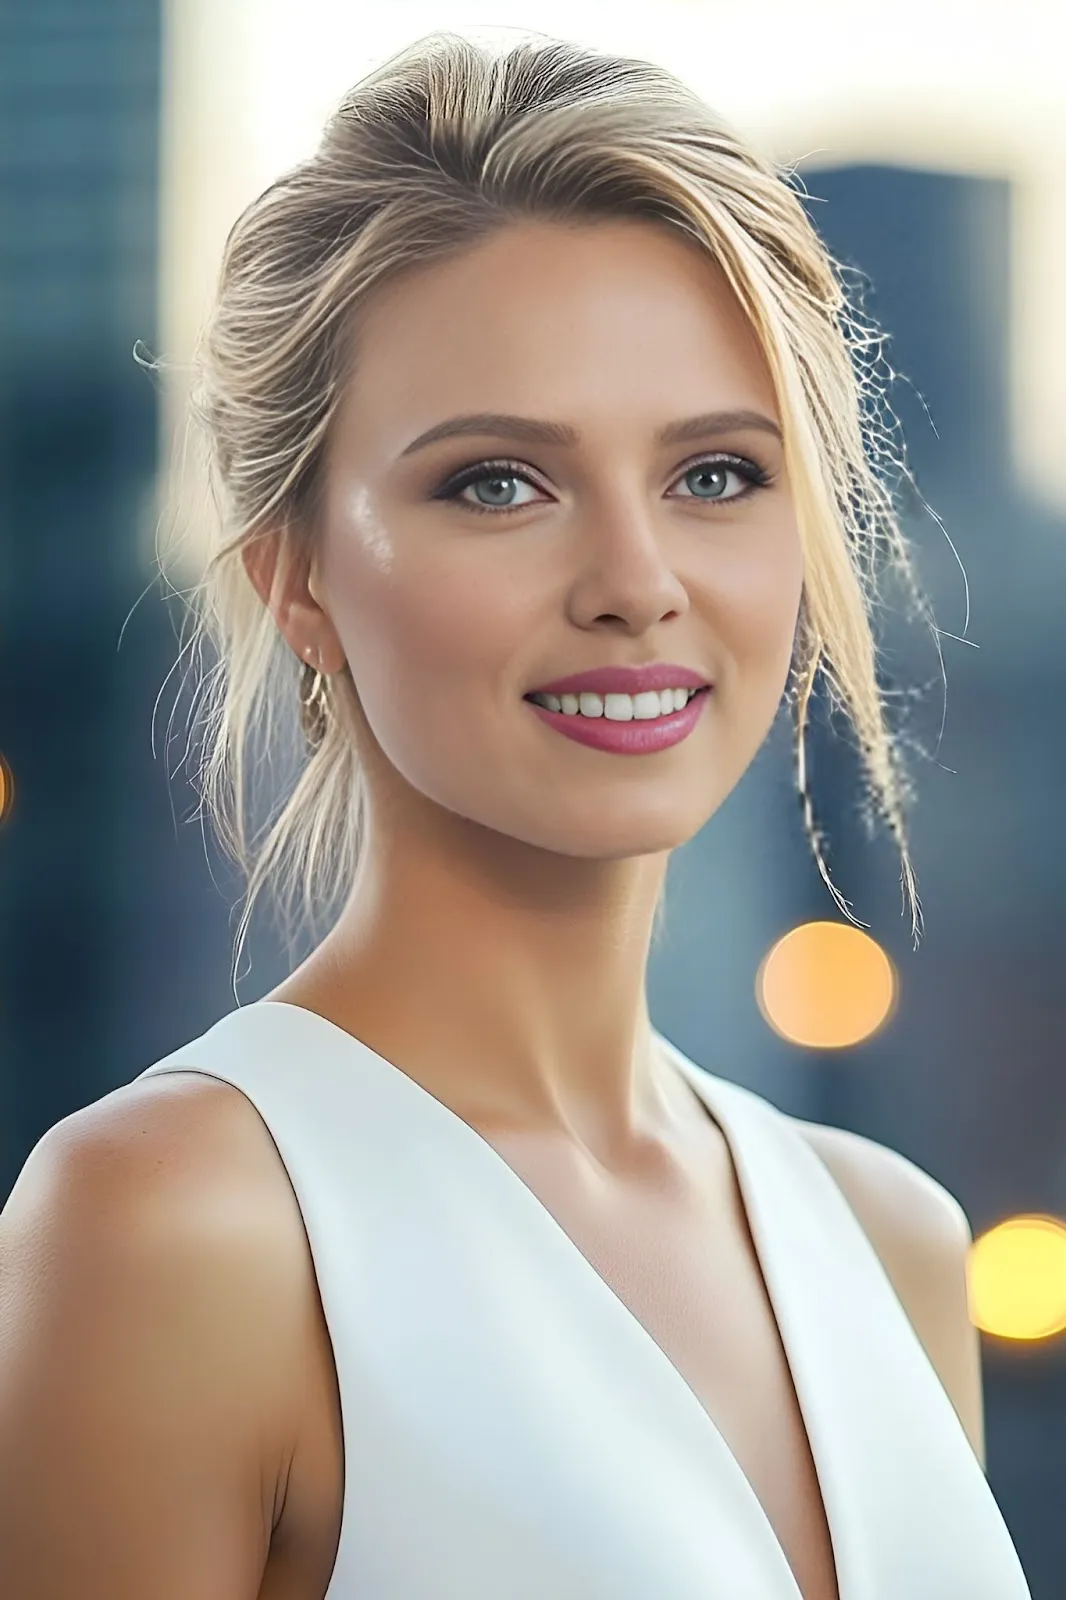
Interestingly, if you swap the images, you get a picture that's as close as possible to the source, but with a different face:
Tips for creating a unique style
Fine-tuning parameters in the settings wizard:
The main secret to working successfully with neural networks like Midjourney lies in the right balance of parameters. For example, we've found that combining a moderate stylization level (--s 300-500) with a carefully chosen reference gives the best results for most projects. It's also important to remember the aspect ratio: different platforms require different proportions.
Here are our proven recommendations for the main parameters:
- Aspect ratio (--ar): use 1:1 for basic avatars or 4:3 for X/Twitter. For wider images there are the 16:9 or 21:9 formats.
- Stylization level (--s): 50-100 for maximum adherence to your prompts, 300-600 for more stylization, 800-900 for abstraction.
- Negative prompts (--no): exclude text, watermarks, blur, distortion, artifacts, noise, or other elements you don't want to see.
- Blending images (Blend): lets you customize the avatar even further, but use no more than 3-4 references, ideally in a similar style.
- Stylization: combine styles (for example, "cartoon + minimalism" for business avatars).
Working with references
Using references can significantly improve the result. You can combine several images to get the effect you want. For example, one image might define the style, and another the pose or composition. When working with references, keep a few important things in mind:
- Try to use illustrations in a similar style
- Don't overload the prompt with too many references
- Specify in the prompt exactly which elements you want to borrow from each reference
Experiment with looks
Don't be afraid to try different approaches to creating an avatar. The most interesting results often come from unexpected combinations of styles and parameters. Try:
- Mixing different artistic styles
- Adding unusual environmental elements
- Playing with color schemes
- Experimenting with lighting
- Changing angles and composition
Advantages and limitations of Midjourney
Before we dive into the details, it's important to understand: Midjourney is like a good artist friend who's ready to help bring your ideas to life. It has its own strengths and quirks, and the better you understand them, the more effective your collaboration will be.
Advantages
Imagine you need to quickly create a series of avatars for your whole team or come up with a character for your project. In the past, you'd have had to find a designer, explain your vision, and wait for revisions. With Midjourney, everything is much simpler and faster. Let's look at the main benefits:
- Speed of creation. Generation takes just minutes, which is much faster than traditional methods.
- Stylization flexibility. You can easily switch styles and try different artistic directions without having to learn new drawing techniques.
- Accessibility. Even without any art education, you can create professional-looking avatars.
- Uniqueness of the result. Every generation is unique, letting you create truly original images.
This is especially useful when a deadline is looming and there's a lot of creative work to do. For example, you need to launch a stream channel and quickly create several avatar options for different platforms. With Midjourney, you can generate 10, 20, or even 50 images in an hour!
A single generation takes no more than a couple of minutes, depending on complexity, and in the end you get 4 finished images.
Limitations
That said, it's important to know not only the strengths but also the quirks of the model. The neural network has its shortcomings, and it's better to know about them in advance to avoid disappointment:
-
The result isn't always predictable. Sometimes it may take several attempts to get the result you want.
-
Limitations in detail. Some fine details can be distorted or missed.
-
Stylistic quirks. Certain styles may work better than others, and this needs to be taken into account when planning.
-
Technical requirements. File size and format restrictions must be followed.
Sometimes generating with MJ feels like ordering a dish at a restaurant – the picture can differ from what actually arrives. For example, when trying to create an avatar with a specific hairstyle, you might get several completely different interpretations of your request. Don't get discouraged – that's normal, just keep experimenting!
Working with any neural network, including Midjourney, is always a creative adventure. Sometimes you'll get exactly what you wanted, and sometimes the AI will suggest something completely unexpected, but no less interesting. The main thing is to approach the process with curiosity and a willingness to experiment!
In closing
In our day-to-day work, we use a range of tools and resources that help us get the best results in Midjourney. We've gathered the most useful ones to save you time searching.
Useful tools
We often use additional tools in GPTunneL. They help create more effective prompts or improve generation results:
- MJ assistant: helps craft detailed image descriptions for prompts.
- Creative Lab: a lab for generating images with other neural networks. You can compare their results with Midjourney to see which model handles the task better.
- Creative Lab gallery: a collection of examples of other users' work with detailed descriptions you can use for your own prompts.
- Vector: converts raster images to vector format.
- Background removal: just upload any image whose background you want to cut out, and within seconds get a processed image in PNG format.
- FaceSwap 2: performs a realistic face swap on a photo (even a generated one).