
Here's the second part of "MidJourney Cheat Codes" — I promise it'll be no less interesting than the first! In Part I of this article, I covered how to get started with the service, what a prompt consists of, what mistakes to avoid, and we looked at the many art styles MidJourney can generate.
The cheat codes and tricks I'm about to share in this article will help you achieve stunning results without needing to write prompts hundreds of words long, hoping the AI will somehow catch what you want... Remember, you don't need long, complicated prompts to create high-quality images!
So
I'll be working through GPTunneL, where a new interface for interacting with MidJourney without Discord recently appeared. On top of that, you can pay with a local card — no VPN needed!
I think many of you have seen prompts like this:
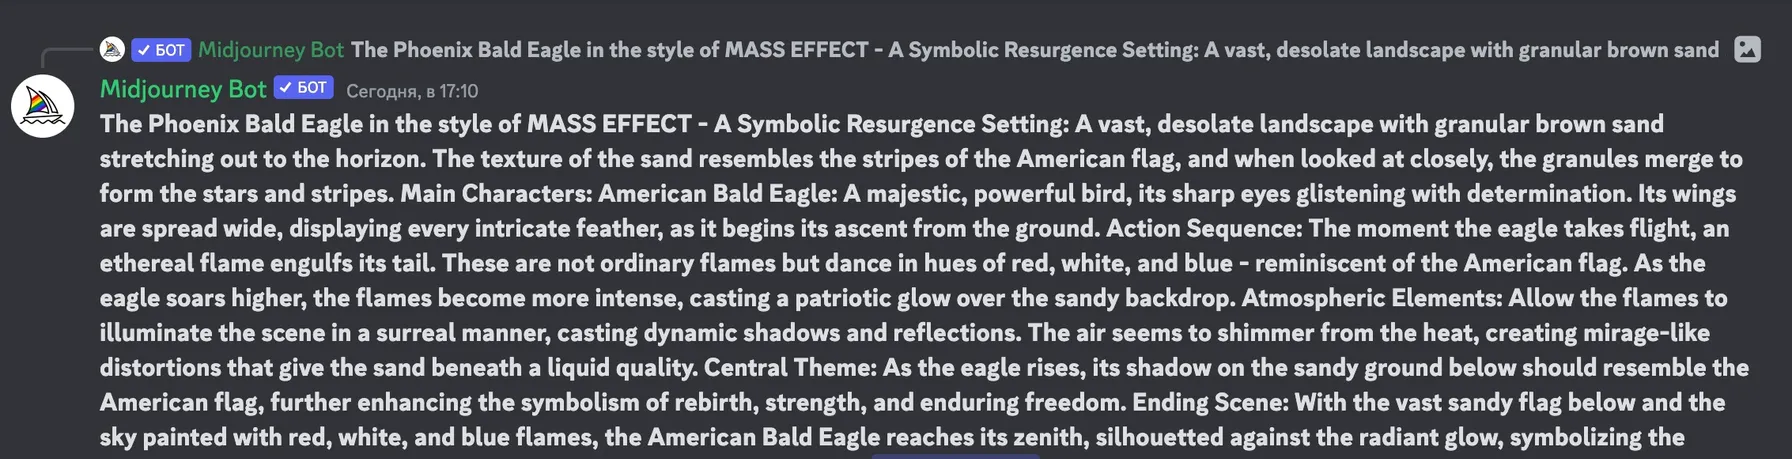
Example of a long MidJourney prompt
It's crazy to write such a long prompt just to create one image! I'll call prompts "requests" too, simply because that word is in the dictionary.
In this part of the article, I'll show you how to get a great result from a short prompt, and cover some other features the service offers.
If you're a beginner and don't quite understand what I'm talking about yet, and don't know where to start, check out the first part of this article, where I explain in detail the initial steps and settings needed to get ready for MidJourney.
MidJourney Cheat Codes — Part I
Let's go!
Cheat code "X as Z"
If you know a character or style your image should be based on and want to create several images from it, you can use "X as Z." Let's say X = Yoda (a Star Wars character) and Z = Mickey Mouse (a cartoon character).
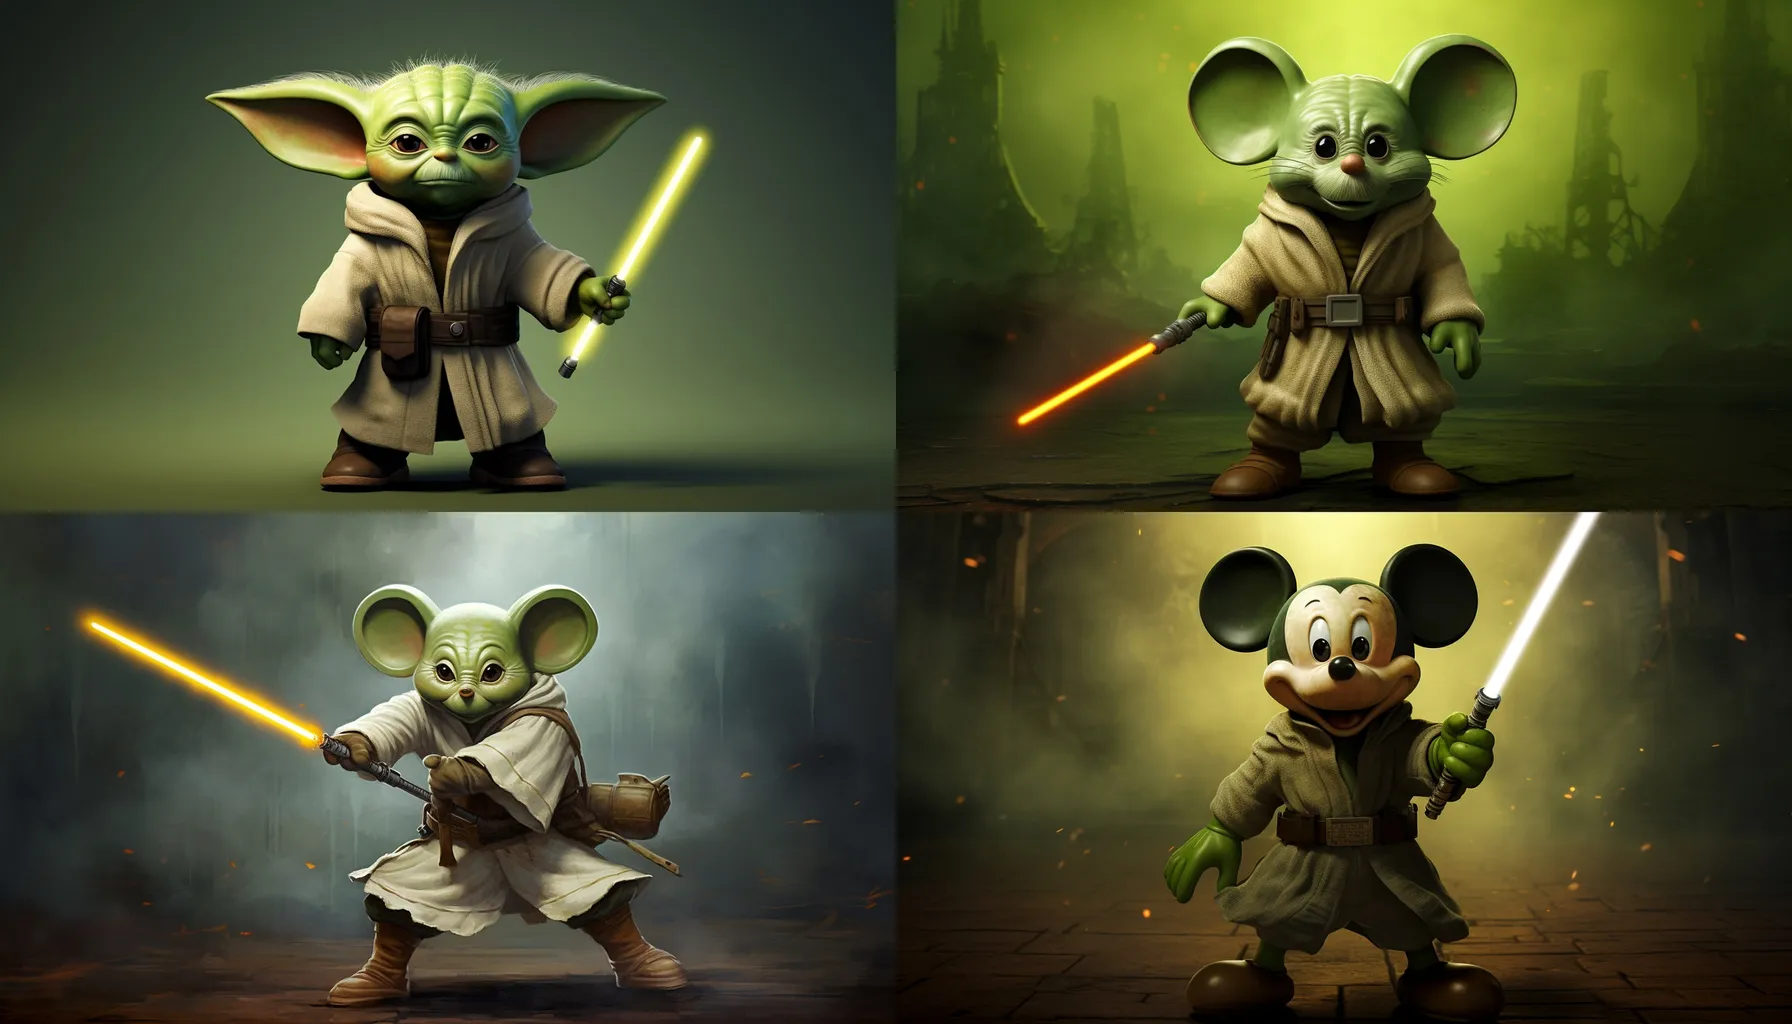
Yoda as mickey mouse --ar 7:4
Cheat code "—no xxx"
If you know exactly what you don't want to see in the generated image, you have the wonderful —no parameter, which lets you exclude specific elements from the image. For example, let's say I want to create an image of a "sea without waves." For that, I'd write "sea —no waves" in the prompt, and here's what I got:
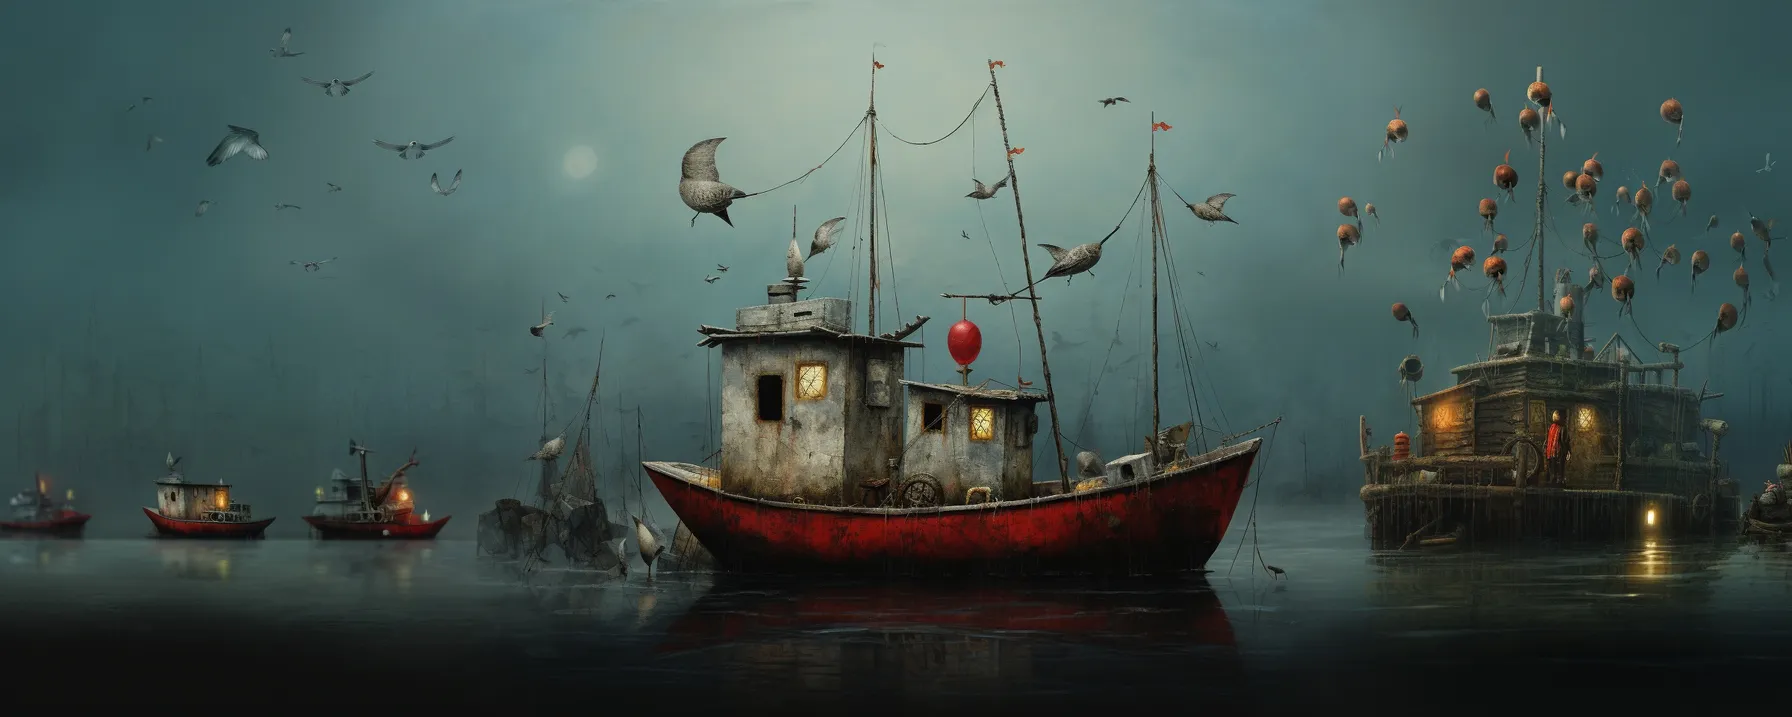
sea —no waves
MidJourney definitely got creative, but the result was a total calm ⛵️
Cheat code "panorama"
You've probably noticed some ultra-wide images popping up throughout this article, especially in the header, and you might be wondering how they were made, given that MidJourney usually generates fairly small images.
This feature is relatively new and a bit hidden in the interface. If you're using a Telegram bot for image generation, you probably won't find this option at all. To use this "cheat code," the resource we mentioned above should work well.
First, create an image, and you'll see 4 buttons:
U1 - means the first image
U2 - the second
U3 - the third
U4 - the fourth
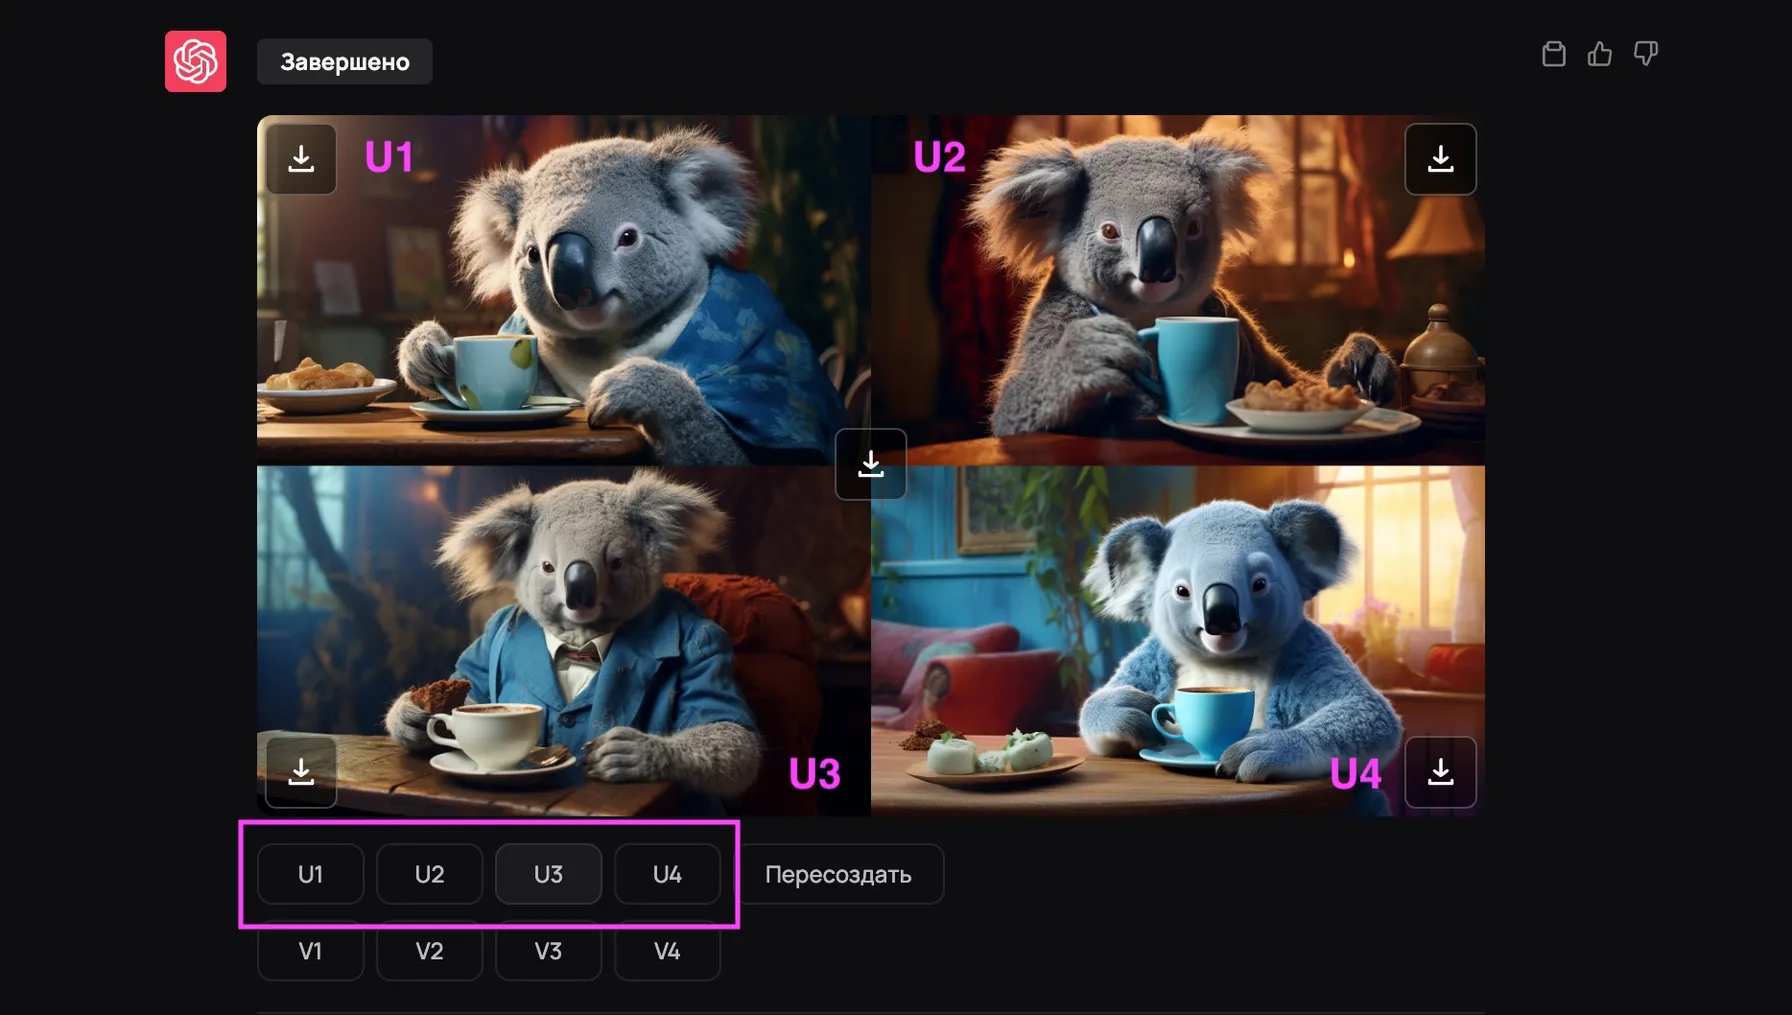
Screenshot of a koala image
Once we select the image we're interested in by clicking one of the buttons, that image appears in the chat along with additional actions:
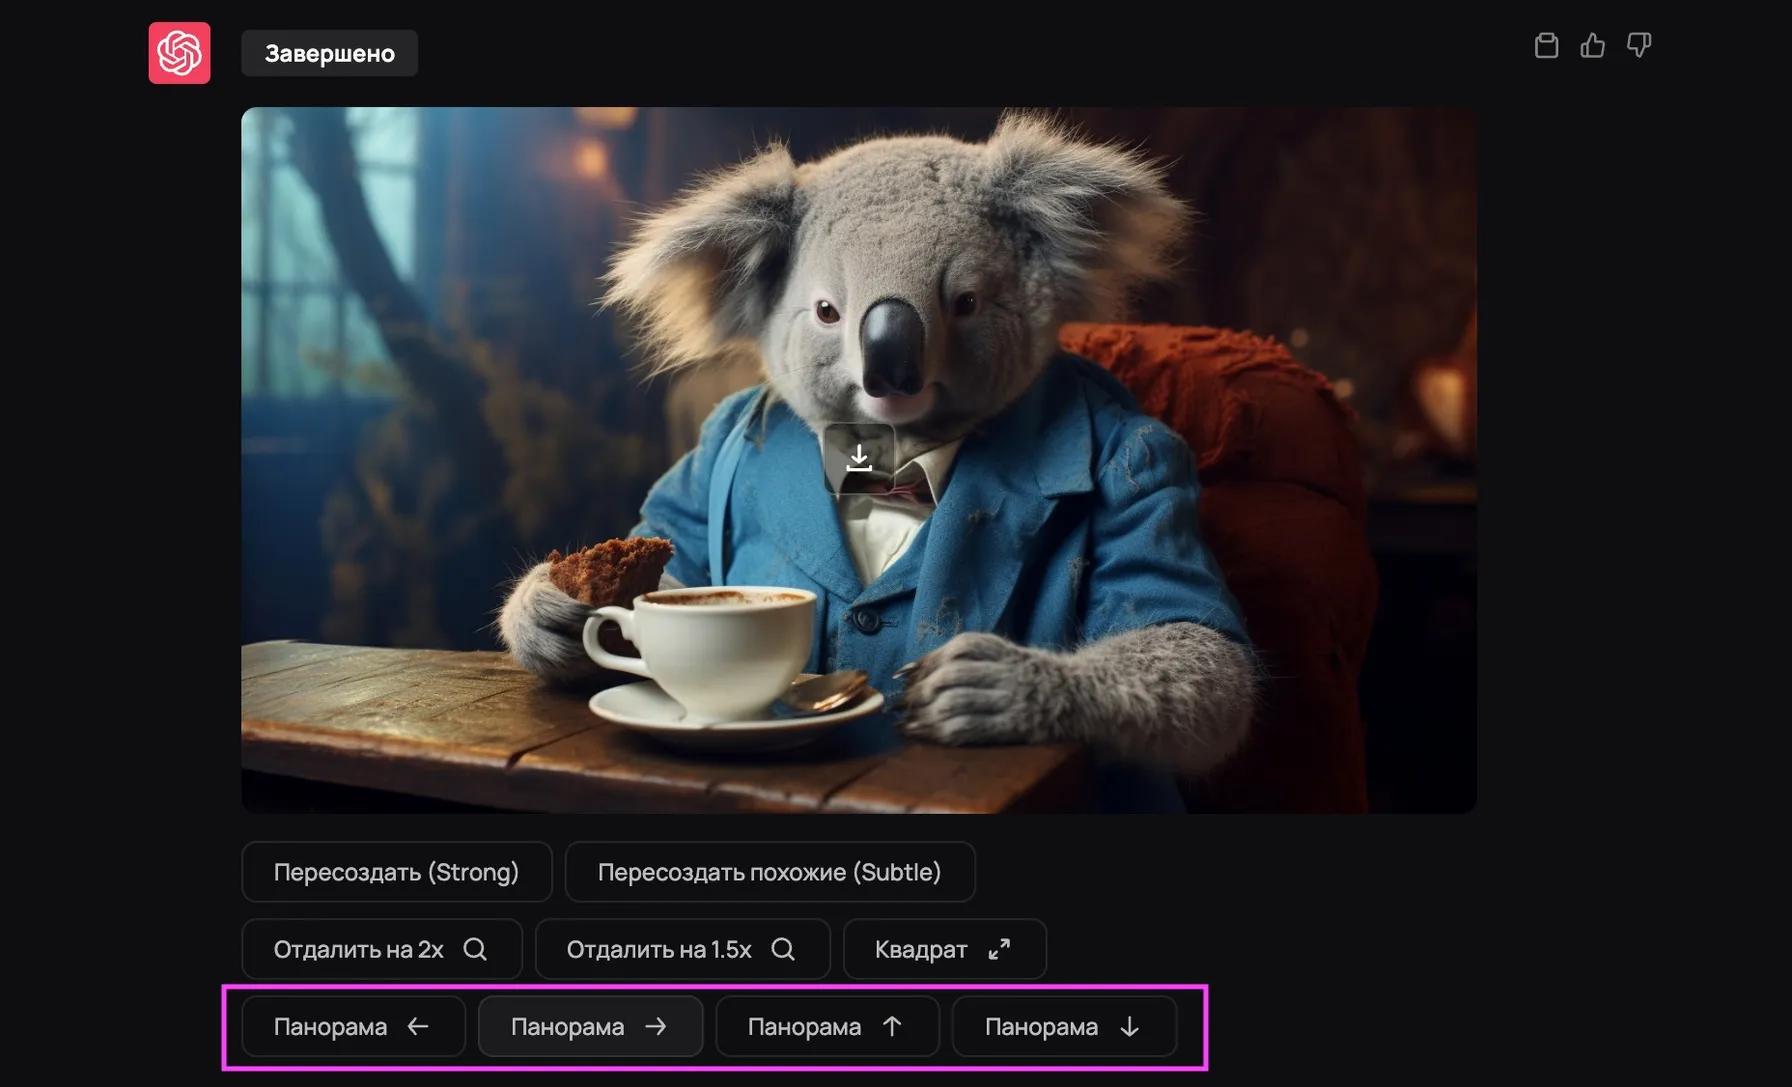
Screenshot of koala image U3
We're interested in the panorama buttons. Note that you can create a panorama in 4 directions: up, down, left, and right. However, once you start building a panorama along one axis (horizontal or vertical), you can only continue along that same axis. So it's important to decide right away which panorama you want.
When we click the button, the system starts extending the image on the specified side, and the final image grows by roughly 50%.
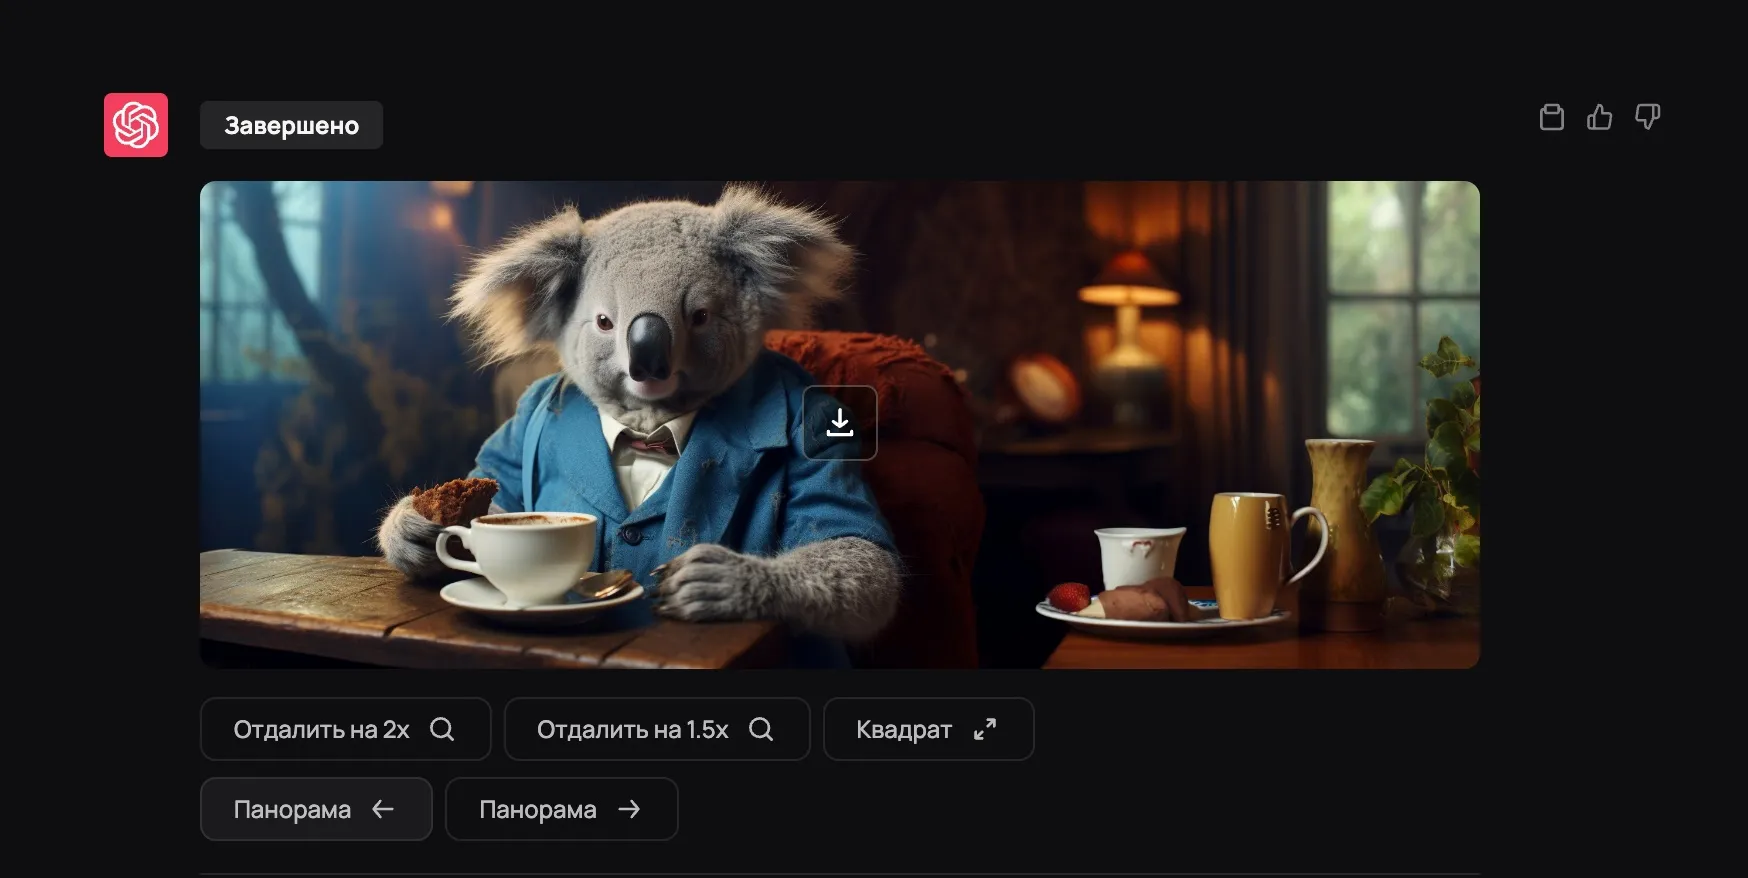
Image showing panorama creation with a koala
By repeating this process and adding new sections to the panorama in the chosen direction, we can build quite a large and striking panoramic image. Each step builds on the previous one and adds new detail, letting us gradually expand and enrich the image.
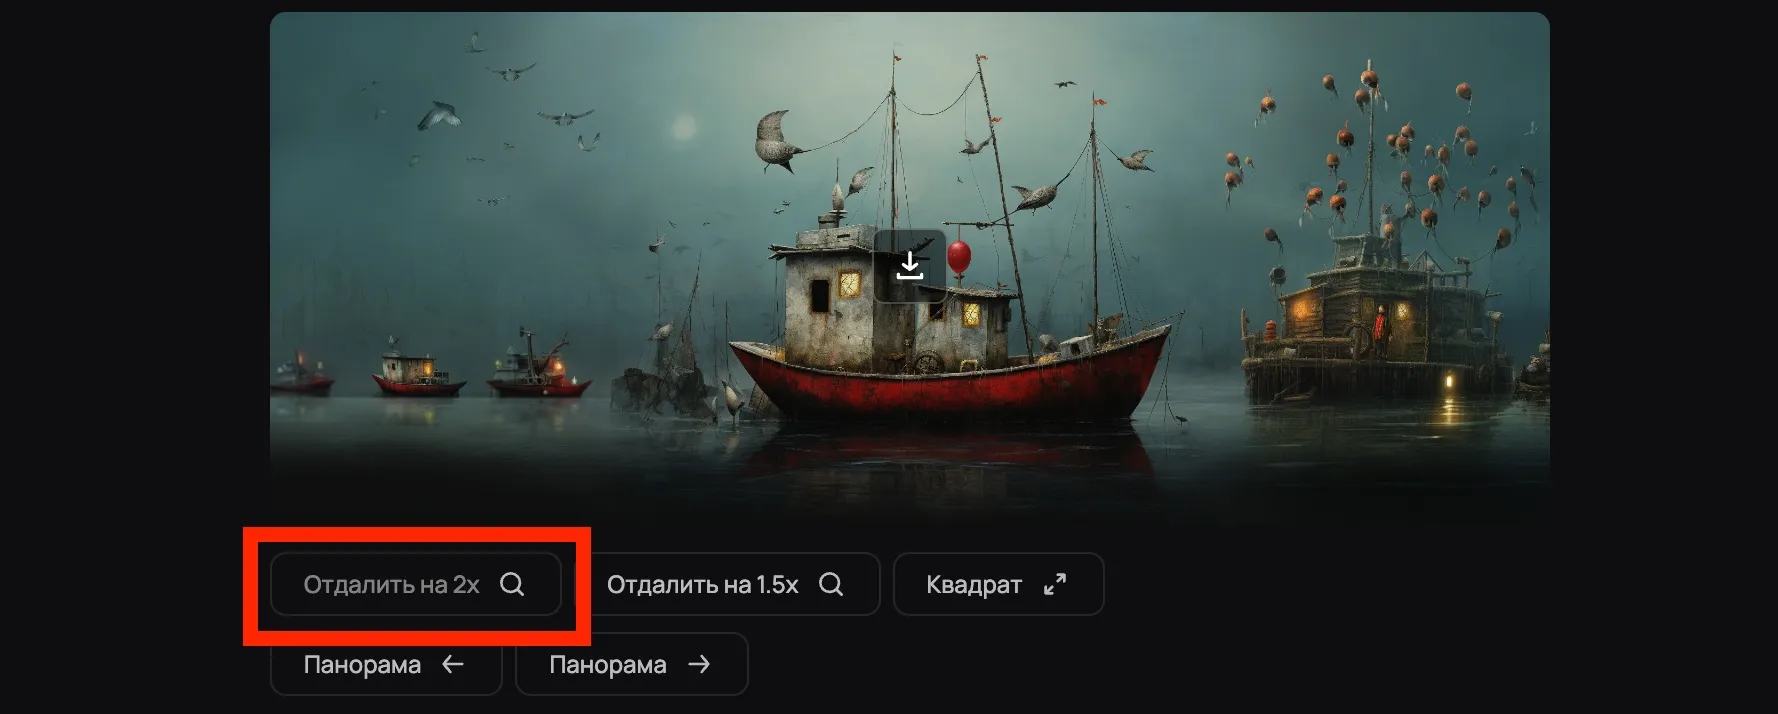
You can also use the 2x zoom-out feature to get an image in the following format:
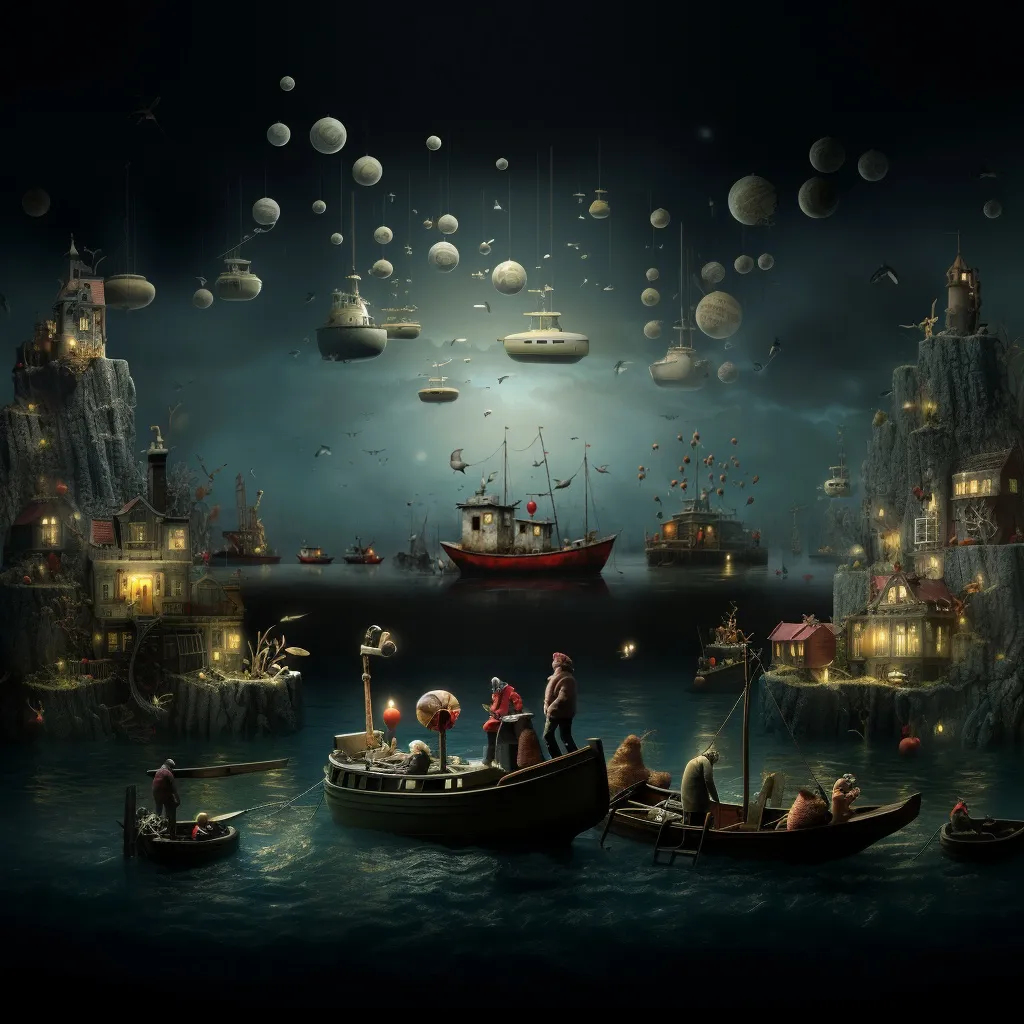
sea --no waves (panorama + x2 zoom out)
Cheat code "blend"
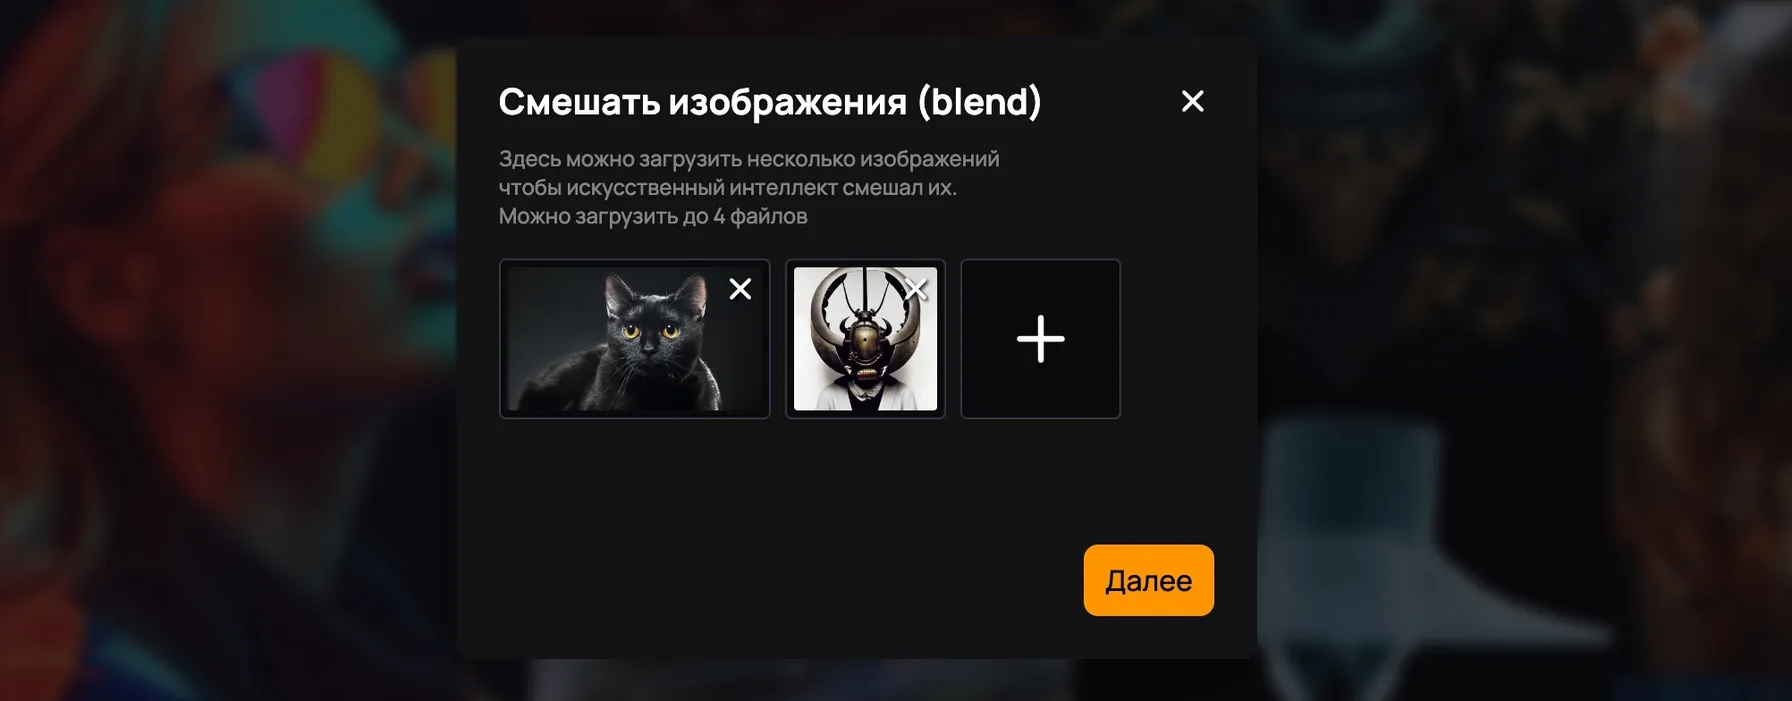
If you feed several images into Midjourney (you can do this by clicking the "Blend" button or pasting an image URL into the text field), the service will study these images and start processing them.
Let's try it: go to the Midjourney model and find the "Blend" button, located above the input field:

Let's paste in a couple of images, for example, a picture of a black cat and some strange helmet.
Take a look at the result we got — pretty great, isn't it?
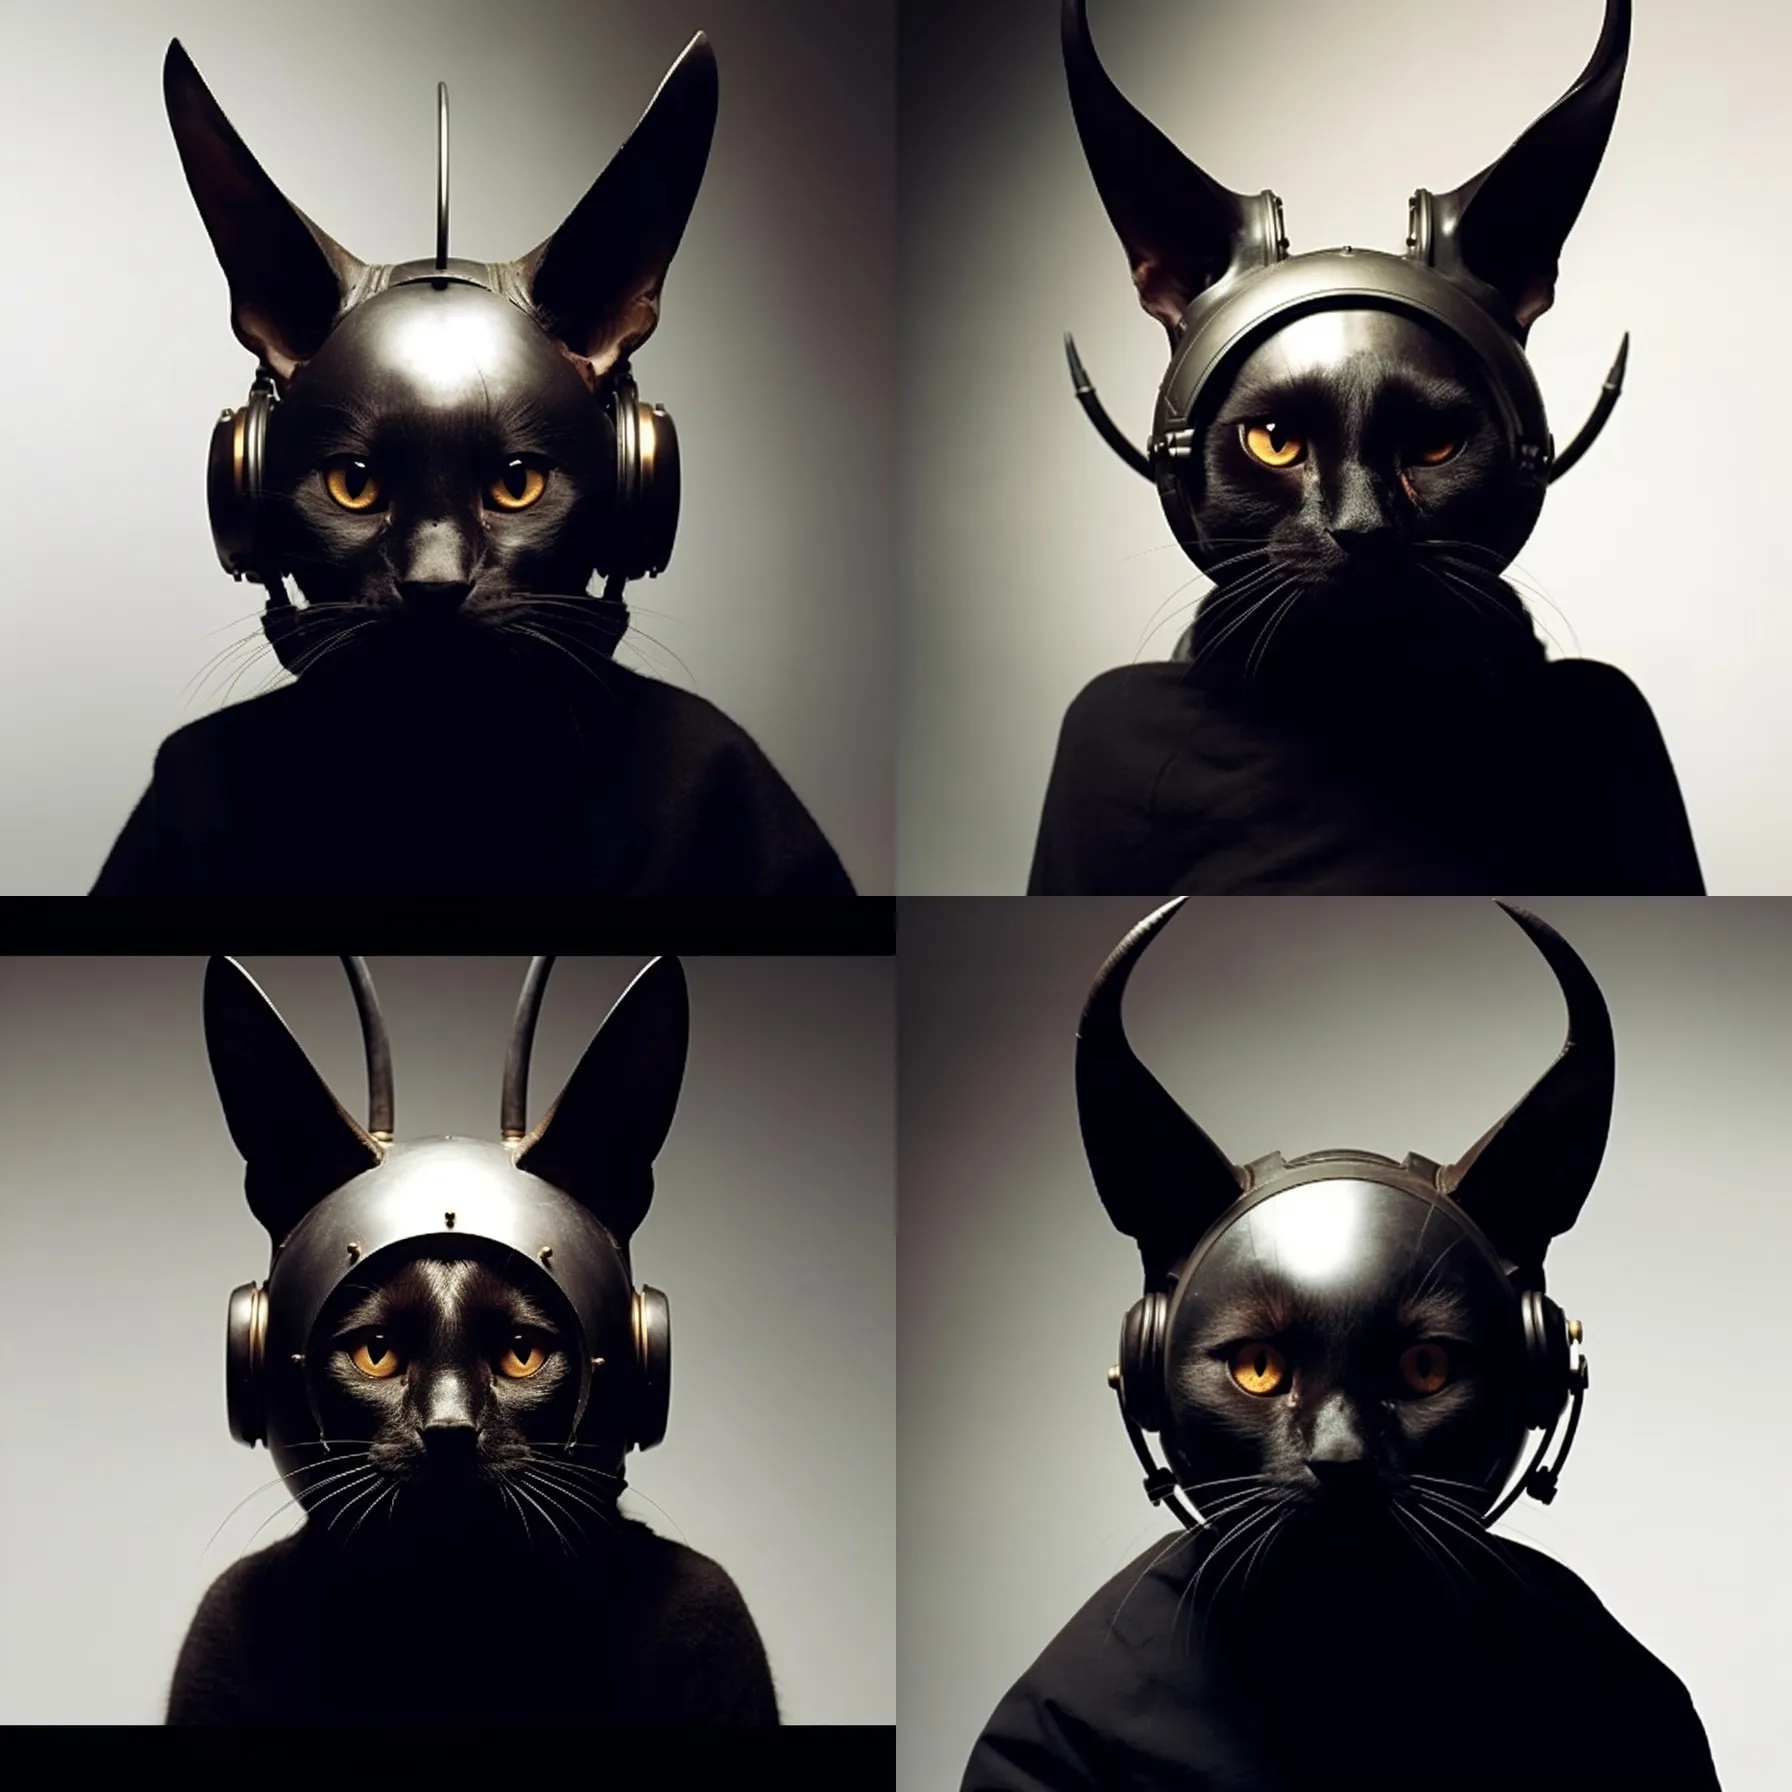
Let's look at a few more examples of blending two images
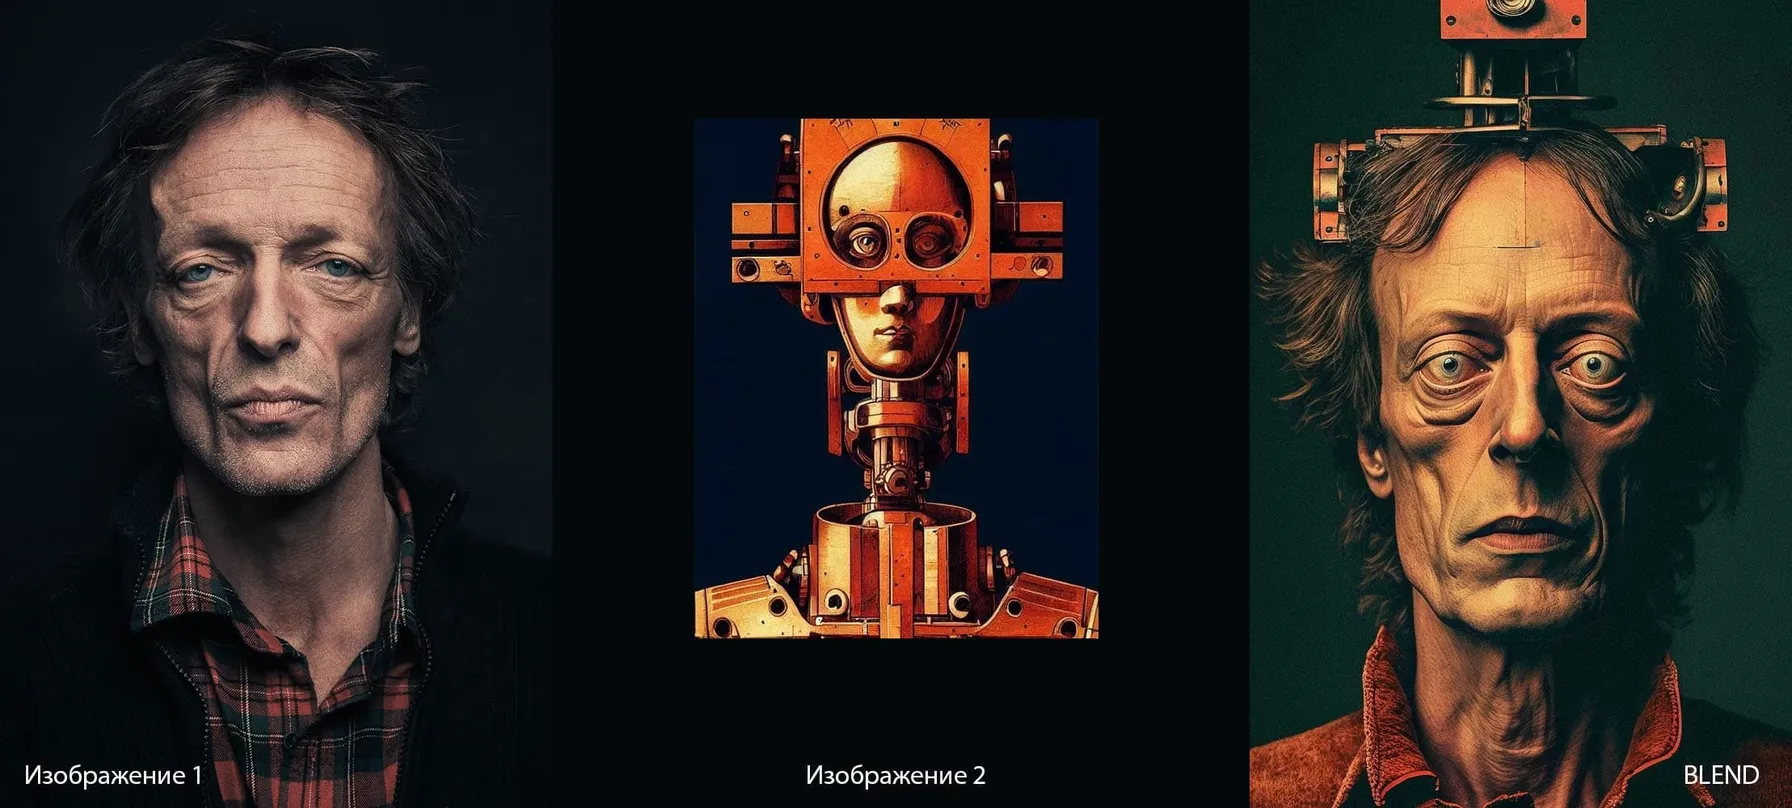
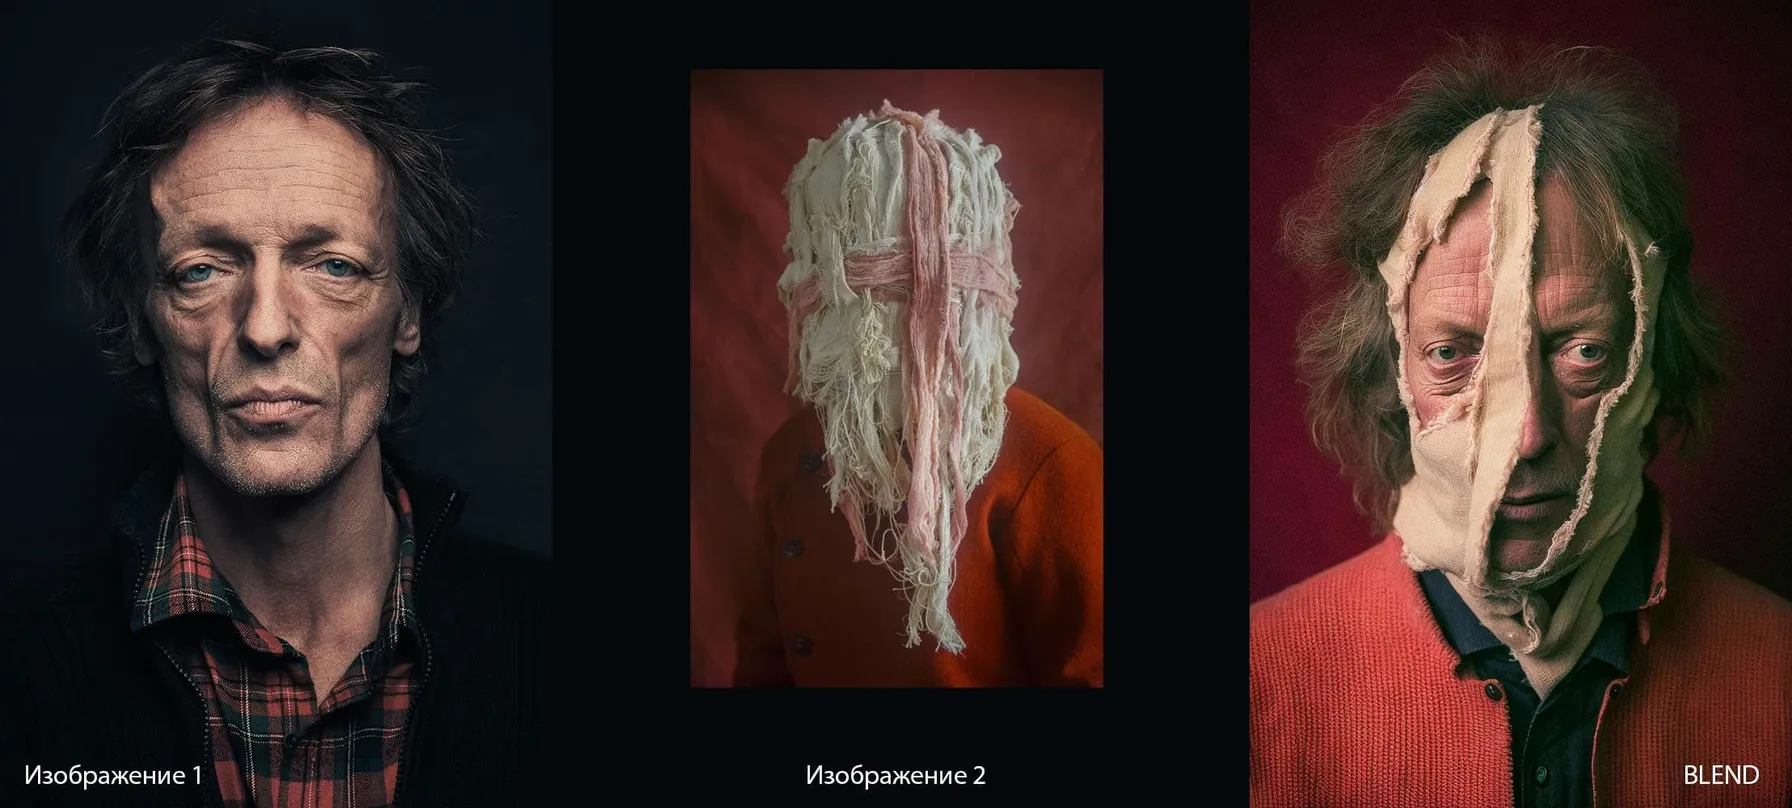
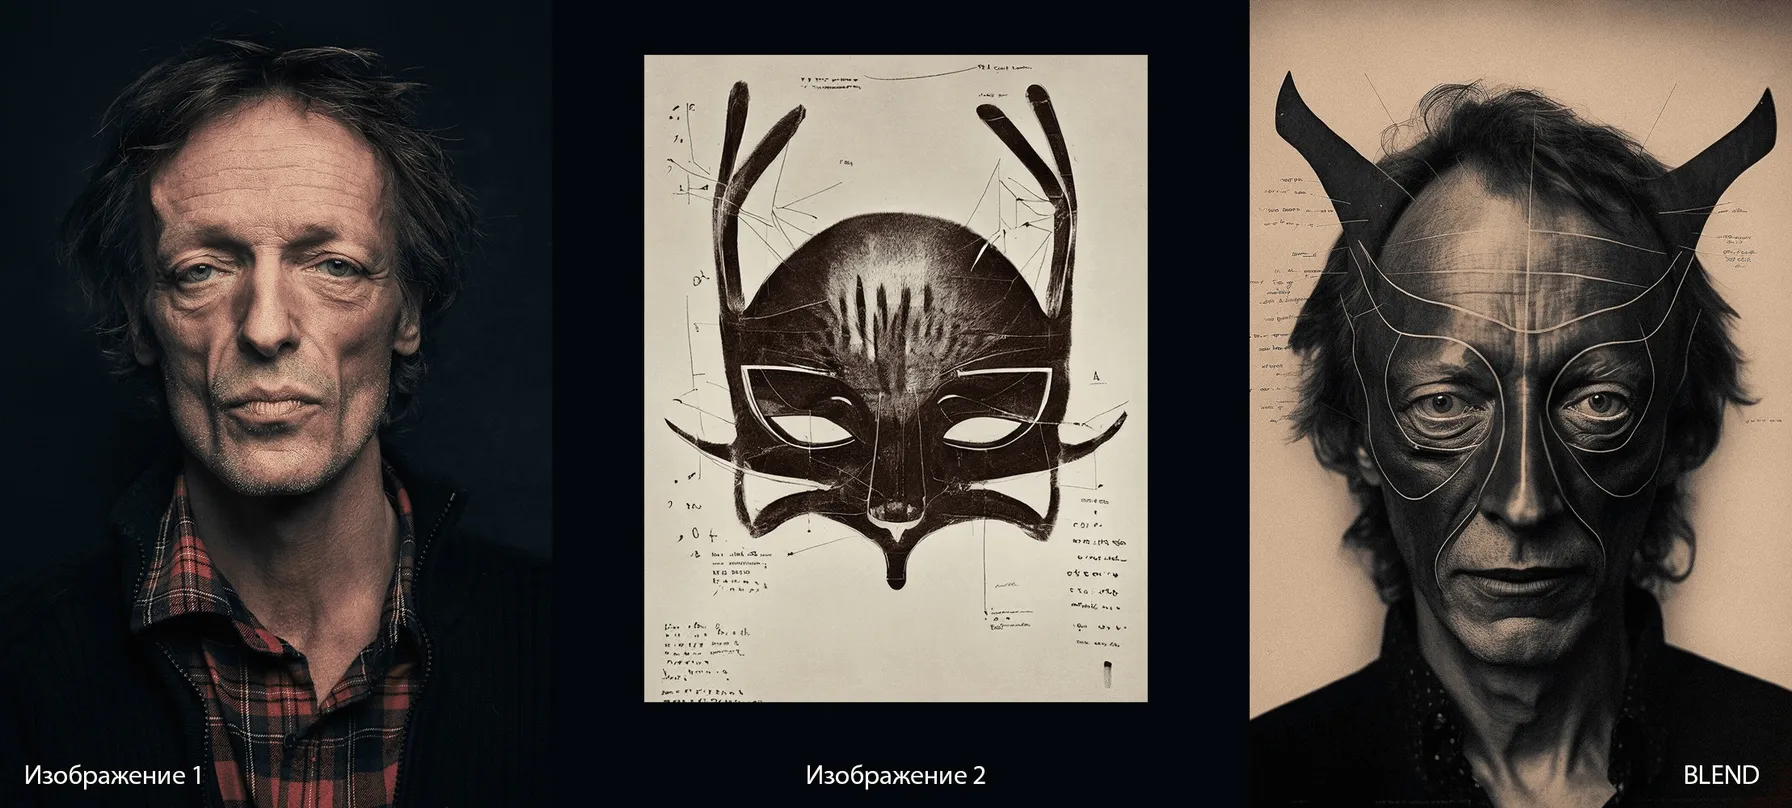
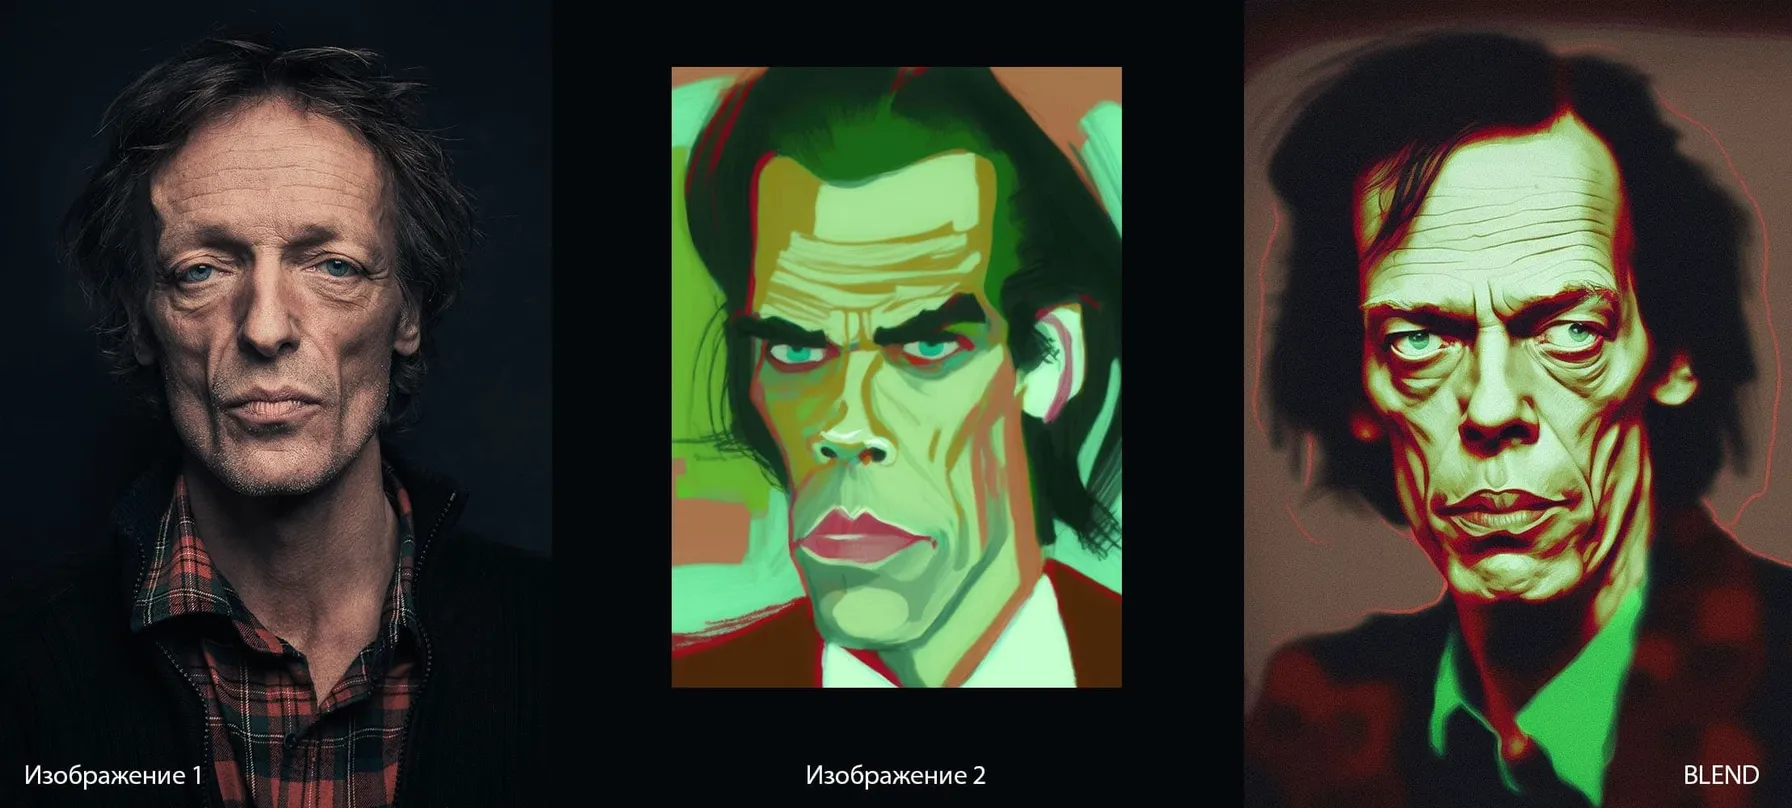
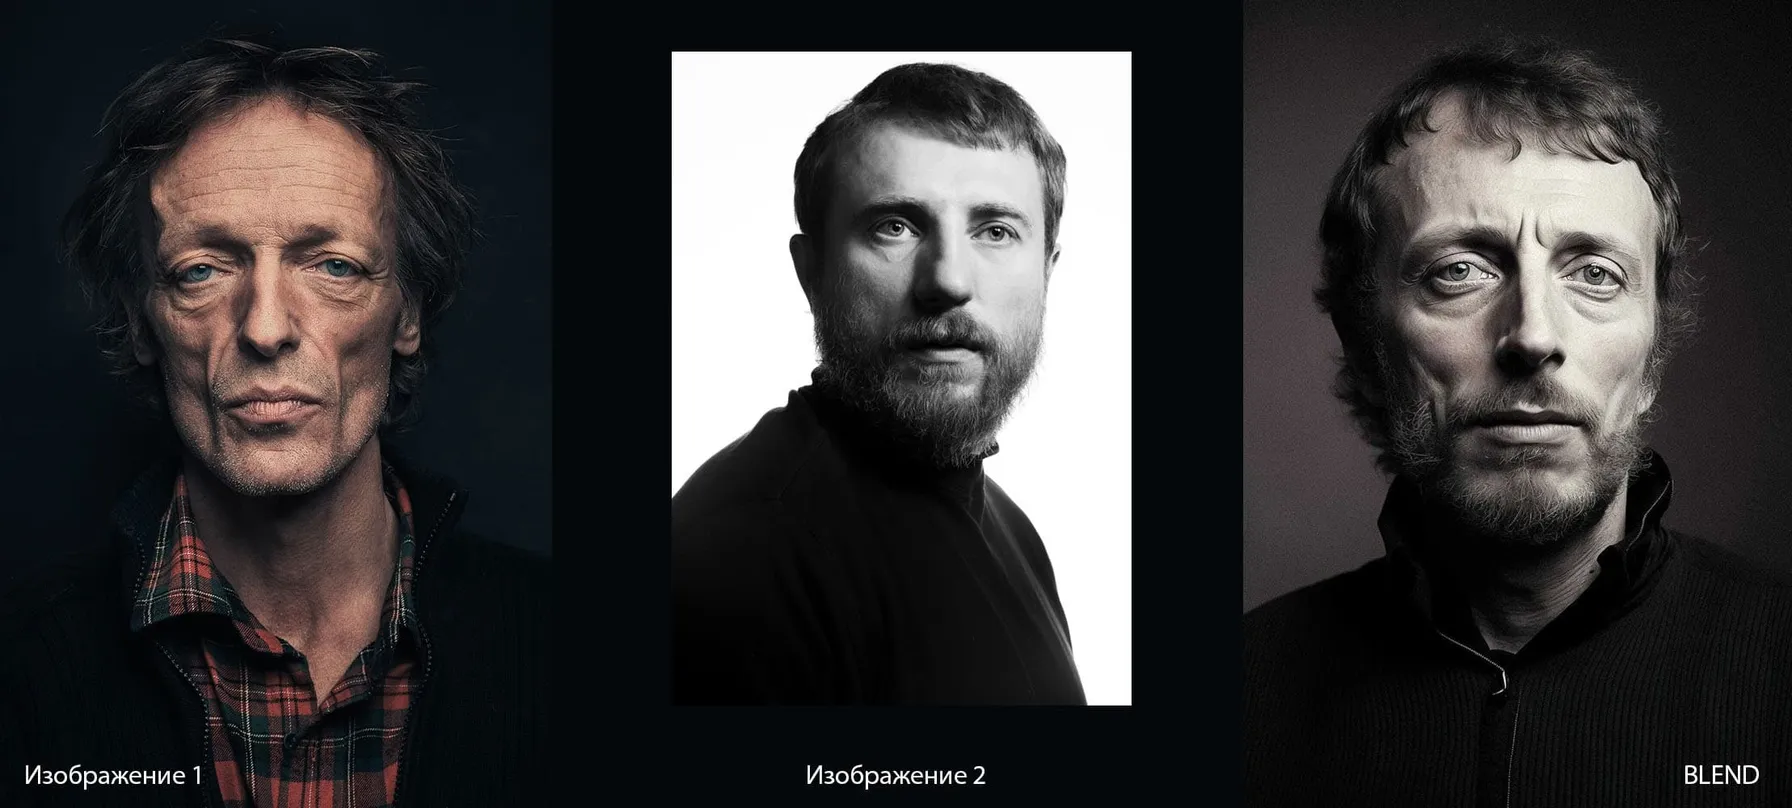
You can also combine blending with text prompts. For example, let's try applying "as xxx" and create an image of Francis in Viking style against a winter mountain backdrop. For this, we'll add just one photo to the blend and write a prompt:

And here, our creative vision came to life in all its magnificent glory!
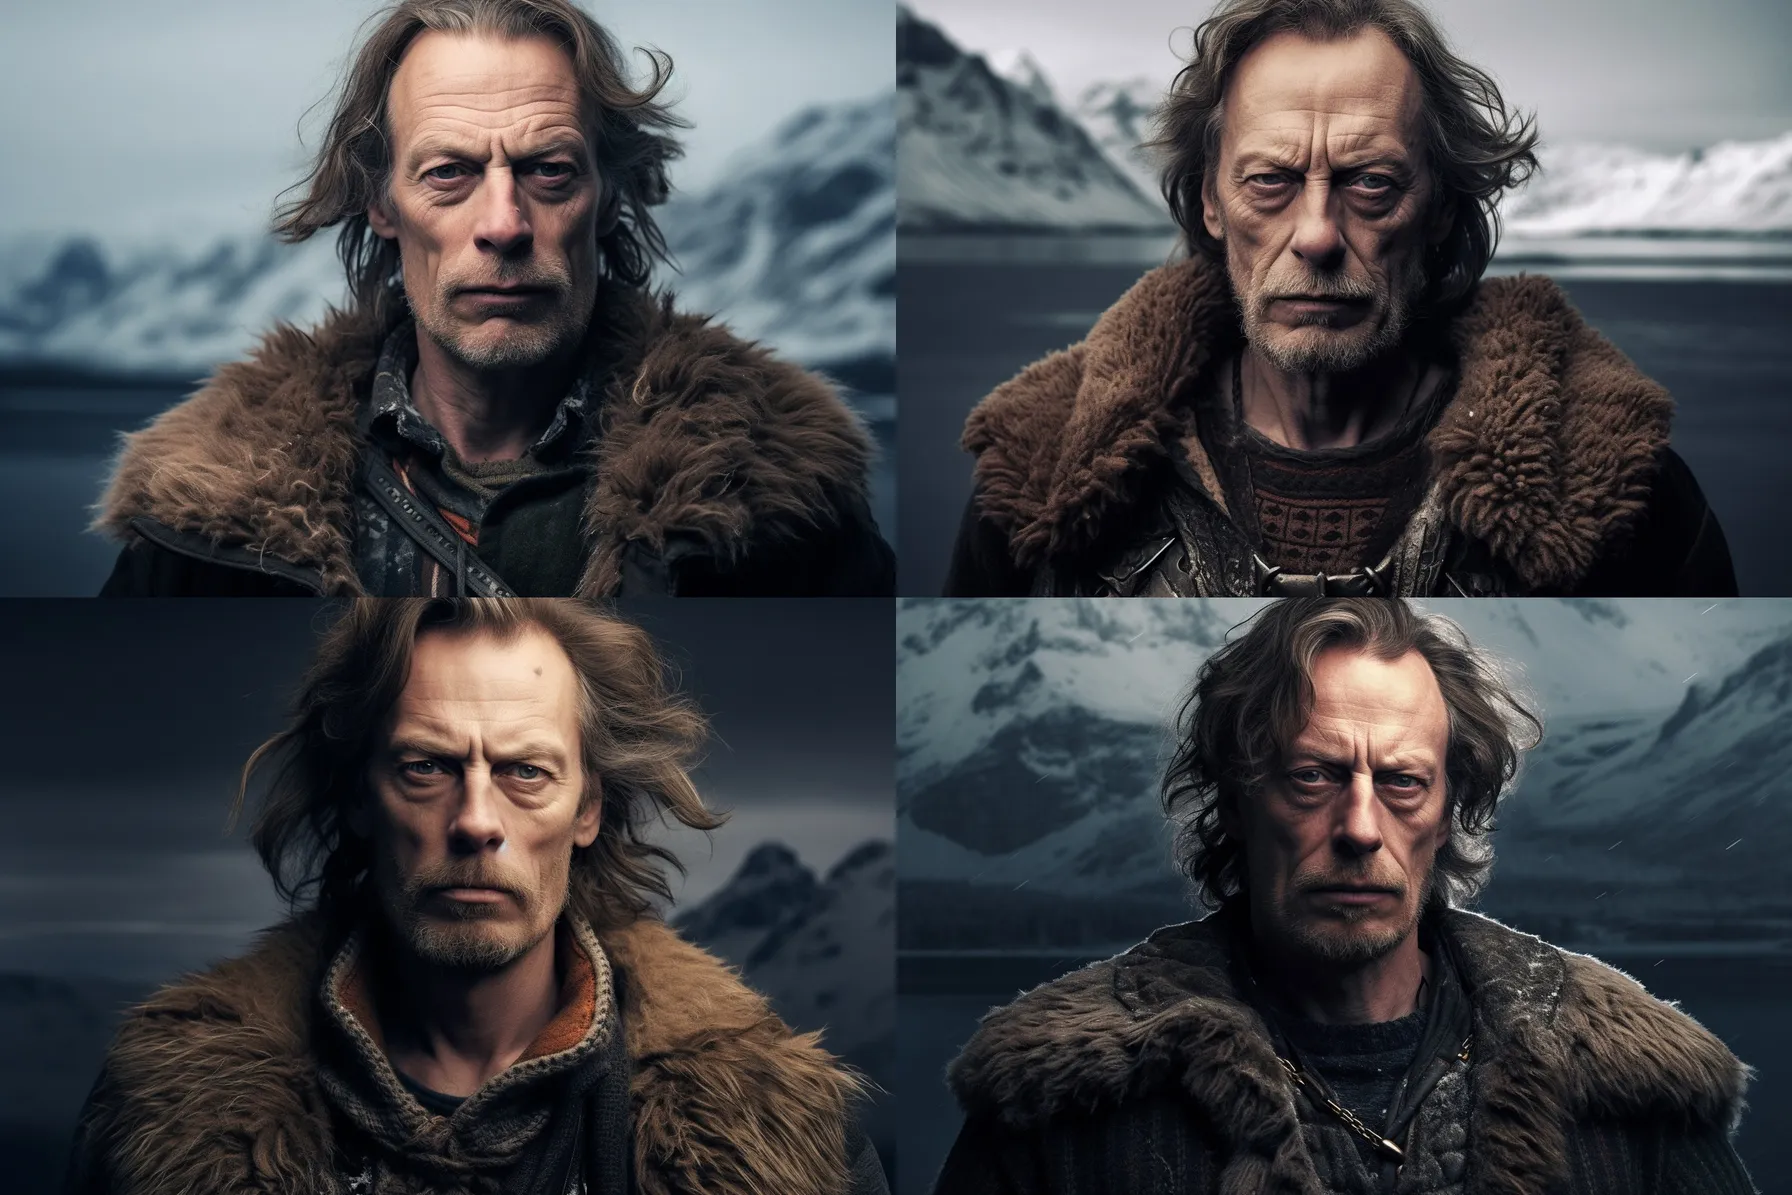
(Francis photo) as Viking with winter mountain background
In fact, our options aren't limited to portraits! MidJourney is capable of creating amazing blends between different scenes and objects. Let's look at a few more blending examples:
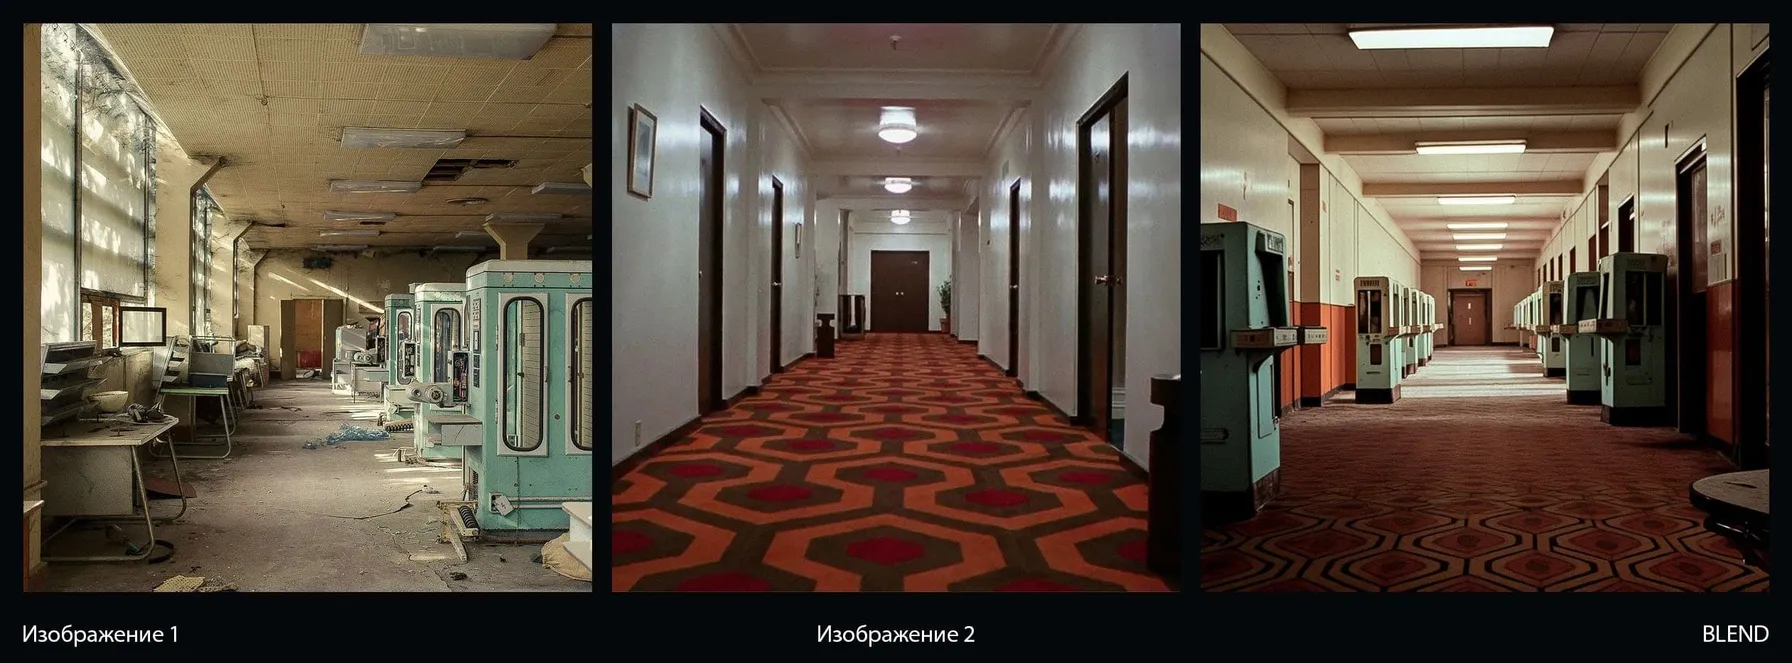
Blending an abandoned film set in Tbilisi and a scene from The Shining (1980)
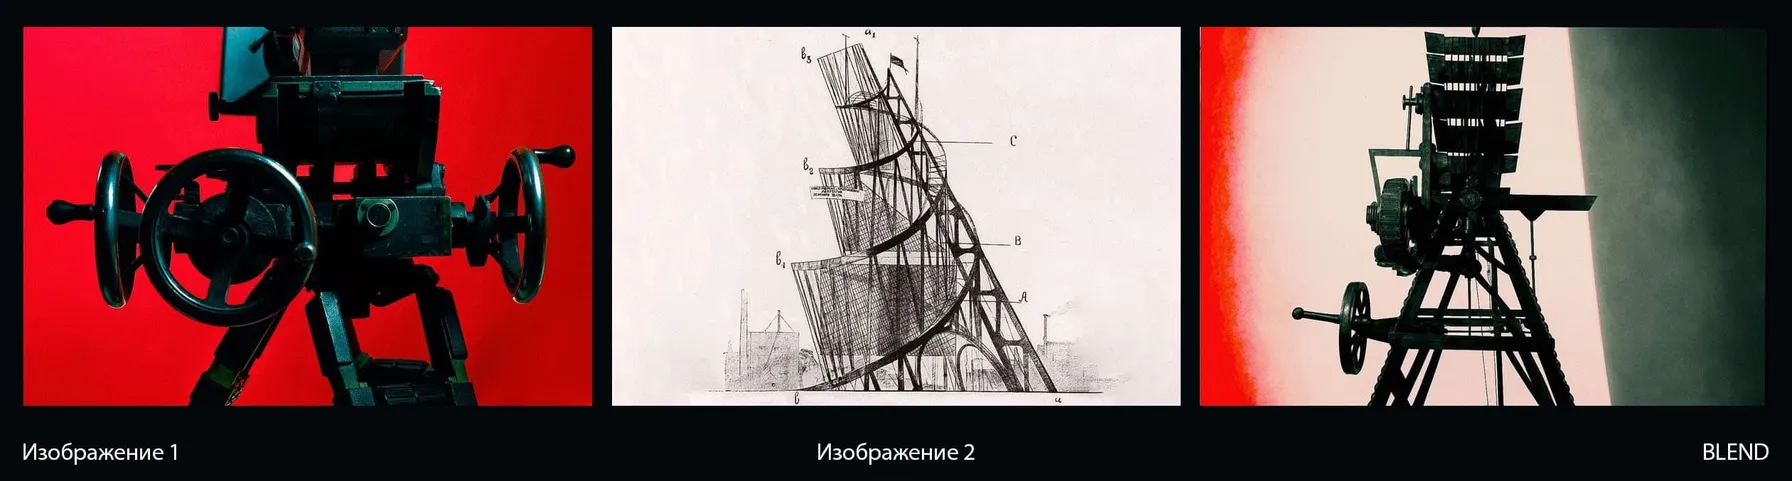
Blending a vintage film projector and Vladimir Tatlin's Tatlin Tower blueprint (1919)
It often happens that MidJourney doesn't know a particular artist or technique. In that case, I use blending to introduce a new style into MidJourney and rework an existing image in that style. And I started with an artist MidJourney unfortunately doesn't know — Adrian Allinson.
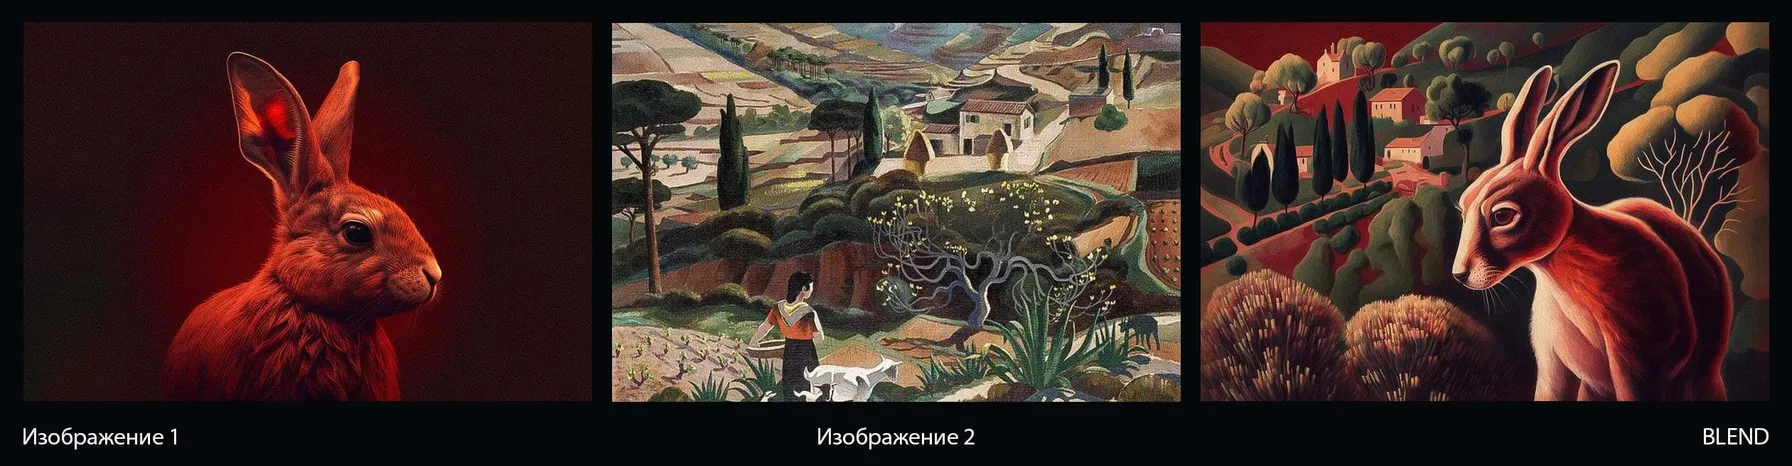
The photos we used were created by photographer Andrei Kovalev. In his article, you can see how he experimented with MidJourney himself and the masterpieces he came up with.
As a reminder, you can get convenient access to Midjourney here: GPTunneL.
Today we told you how to create something amazing without resorting to long, heavy prompts. We also shared some exciting new features of MidJourney 5.2.
Subscribe to our Telegram channel @gptunnel, where we share the latest news and fascinating stories. We don't run ads, just interesting and useful content for you.